
One of the most useful capabilities of JavaScript is that it lets you manipulate almost anything on a webpage, even if you don’t have access to the HTML or CSS.
What’s the use of manipulating something on a webpage? Well, if you can manipulate something on a webpage you can change the webpage.
Need to build an email form to collect emails for your event? Create an image gallery that allows people to share your pictures? Make the page dance, sing, and be merry?
Whatever you need to do, you can almost always do it with JavaScript. This is why it’s one of the most popular programming languages today, its versatility and flexibility allow you countless opportunities to change a website as you desire.
When programming with JavaScript you will inevitably be interacting with data, usually, but not always, you’ll be trying to change this data somehow.
Here’s an example of a data interaction with JavaScript: think of a news website that publishes stories about apartments. Perhaps they have a style guide that says every time the words “tenant association” appears they should be capitalized.
Let’s say the news website also works with hundreds of writers and not all of these writers remember to capitalize tenant association.
In this instance, as a savvy JavaScript programmer, you’d want to use JavaScript to automatically capitalize tenant association every time it appears on your webpage, regardless of if the writer remembers to or not.
In this example the words “tenant association” are data (text data is called a string in JavaScript) and uppercasing the words is a form of interacting with the data, specifically changing it.
Before you can interact with data in JavaScript you’ll need to store it somewhere and provide a reference to it. To store data and reference it you’ll use something called a variable.
Variables are one of the most frequent tools you’ll be using as a JavaScript programmer and they allow you to store data and reference it. While there are many reasons why you must do this, for the sake of keeping things simple you’ll have to take my word for it.
Storing data and creating a reference to it in JavaScript is called declaring a variable and variables are, as mentioned, one of the core building blocks of JavaScript programming.
There are three parts to creating a variable in JavaScript: creating and naming the variable, assigning some data to the variable, and referencing the variable.
Creating and naming the variable
To create and name a variable in JavaScript you use the following syntax.
var nameOfVariable;
vartells JavaScript that you want it to create a new variable.nameOfVariabletells JavaScript the name you want it to assign to the new variable.
All JavaScript variables must be given a unique name, and generally, the rules for constructing names for variables (unique identifiers) are:
- Names can contain letters, digits, underscores, and dollar signs
- Names must begin with a letter
- Names can also begin with $ and _ (this is not recommended)
- Names are case sensitive (y and Y are different variables)
- Reserved words (like JavaScript keywords) cannot be used as names
- camelCase is preferred
- Try to be descriptive when naming your variables. This makes your code easier to read.
Try following the steps below to create a variable named myVariable in your browser console now. If you need some help accessing your browser console this guide will show you how.
- Navigate to your browser’s JavaScript console
- Type
var myVariablein the console window - Press enter
You should see something similar to this:

Congratulations, you’ve just created your very first JavaScript variable.
This may seem trivial, but it’s one of the most important steps in JavaScript programming, and now that you’ve created your variable it’s time to assign some data to it.
Assigning data to the variable
To assign data to the variable you just created using the following syntax:
var nameOfVariable = data;
vartells JavaScript the name you want it to assign to the new variable.nameOfVariabletells JavaScript the name you want it to assign to the new variable.=tells JavaScript to assign everything to the right of the=to the variable. This is called an assignment operator.datatells JavaScript the specific data you want to assign to the variable.
Try following the steps below to assign the word "Hello" to the variable you created called myVariable.
- Navigate to your browser’s JavaScript console
- Type
var myVariable = "Hello"in the console window - Press enter
- Type
myVariable(without the var this time) - Press enter
You should see something similar to this:
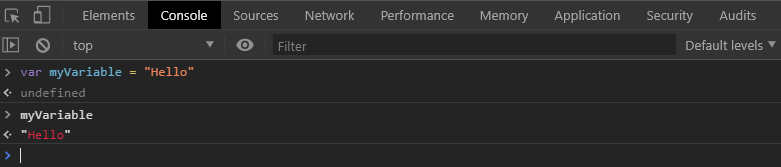
Congratulations again, you’ve just assigned data to your very first JavaScript variable.
In this case, you’ve assigned a string to myVariable.
You are now well on your way to using JavaScript to do some incredible things. And just so you know, you can assign more than strings to variables. Data types can also be numbers, boolean, null, undefined, and symbol.
This guide from W3C provides an overview of datatypes in JavaScript.
Referencing the variable
When you named your variable a few moments ago you created a way to reference it, and referencing it makes changing the data stored within it much easier.
Referencing your data in JavaScript is pretty straightforward, you just use its name. Try the following example in your browser console to reference your variable:
- Navigate to your browser’s JavaScript console
- Type
var myVariable = "Hello"in the console window - Press enter
- Type
myVariable(without the var this time) - Press enter
- Type
alert(myVariable)
You should see something similar to the screenshot from the previous step with one difference: a popup should appear that says "Hello".
What happened here? Magic!
When you typed alert(myVariable) you told JavaScript you wanted it to create a popup with the text "Hello", but instead of writing "Hello" you referenced the variable you created with the name myVariable. In essence, the name you give to a variable with data is the data, and using named variables helps you add meaning to your code, and keeps it cleaner and easier to manage.
Here’s another example, imagine you wanted to calculate the age of someone born in 1950. Without a named variable you’d do the following:
2020 - 1950 = 70;
Now imagine you had ten different age calculations. You’d have to write something like this:
2020 - 1950 = 70;
2020 - 1954 = 66;
2020 - 1990 = 30;
2020 - 1967 = 53;
2020 - 1989 = 31;
2020 - 1988 = 32;
2020 - 2001 = 19;
2020 - 2004 = 16;
2020 - 1963 = 57;
2020 - 1999 = 21;
As you can see, there’s lots of repetition and by using a named variable you can greatly simplify this process. Here’s what the above looks like using a variable named currentYear.
var currentYear = 2020;
currentYear - 1950 = 70;
currentYear - 1954 = 66;
currentYear - 1990 = 30;
currentYear - 1967 = 53;
currentYear - 1989 = 31;
currentYear - 1988 = 32;
currentYear - 2001 = 19;
currentYear - 2004 = 16;
currentYear - 1963 = 57;
currentYear - 1999 = 21;
At first, it may seem odd to subtract a word from a number, but remember, you are actually subtracting data, the words are simply the reference you gave to the data through a variable.
Don’t get caught up on the example above which is very simple and not a great use case for variables, it’s only an example. The real magic of named variables becomes evident when you are dealing with thousands of lines of code.
Go ahead and try subtracting two named variables in your console.
- type
var currentYear = 2020; - press enter
- type
var yearOfBirth = 1950; - press enter
- type
currentYear - yearOfBirth; - press enter
You should see something similar to this:
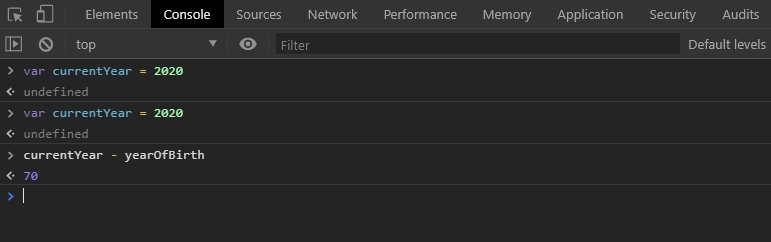
Pretty cool, right?
Alright, so now you know how to create, name, and reference variables. Here’s a recap to help you solidify your understanding of JavaScript variables.
Recap
- When programming with JavaScript you will often be interacting with data
- Before you can interact with data in JavaScript you’ll need to store it somewhere and provide a reference to it
- To store data and reference it you’ll use a variable.
- Variables allow you to store data and reference it
- To create and name a variable in JavaScript you use the following syntax.
- var myVariable
- To assign data to the variable use the following syntax
- var myVariable = “Hello”
Now let’s learn how to start applying what we’ve learned so far. Let’s write and execute some code in our JavaScript console!