
One of the best ways to become familiar with a language is to use it. Lucky for you, you’ve already got everything you need to start using JavaScript.
In this guide, I’ll introduce you to the JavaScript console as well as show you how to run some really neat JavaScript in it.
This is probably my favorite part of learning a subject: applying it. It’s where all your learning comes together and where you’ll start seeing practical ways to implement the new skills you’ve picked up.
If you are new to JavaScript and haven’t already done so, I’d recommend you read my beginner’s guide to JavaScript basics followed by Getting started with JavaScript variables before reading this guide.
Otherwise, let’s begin.
Your console and you
Writing JavaScript is only half the fun of JavaScript — there’s a whole other dimension of problem-solving that only becomes apparent after you try to run your code.
From figuring out why it won’t run to testing cross-browser compatibility and more, you’ll need to consider more than just proper syntax and best practices when crafting your code.
But first, you’ll need somewhere to run your JavaScript.
Luckily for you, every modern web browser comes with a set of developer tools to do just that. These tools allow you to interact with the three front-end technologies used to create websites: HTML, CSS, and JavaScript.
The specific tool we’ll be focusing on in this guide is the JavaScript console watch allows you to write and run JavaScript right here in your web browser.
Setting up your workstation
Before we start writing some JavaScript let’s take a moment to set up our workspace to make this guide easier to follow.
Open up this page in a new browser window and place it beside this window as demonstrated in the screenshot below.
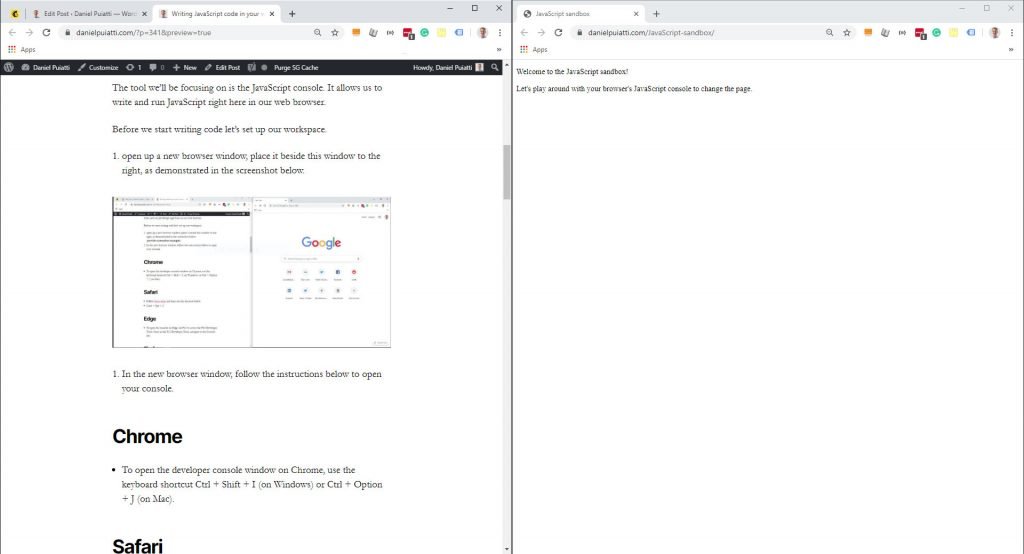
In the new browser window, follow the instructions below to open your JavaScript console.
Chrome
- To open the developer console window on Chrome, use the keyboard shortcut Ctrl + Shift + I (on Windows) or Ctrl + Option + J (on Mac).
Safari
- Follow these steps and then use the shortcut below.
- Cmd + Opt + C
Edge
- To open the console on Edge, hit F12 to access the F12 Developer Tools. Once in the F12 Developer Tools, navigate to the Console tab.
Firefox
- To open the console on Firefox, use the keyboard shortcut Ctrl + Shift + K (on Windows) or Ctrl + Option + K (on Mac). The toolbox will appear at the bottom of the browser window, with the Web Console activated.
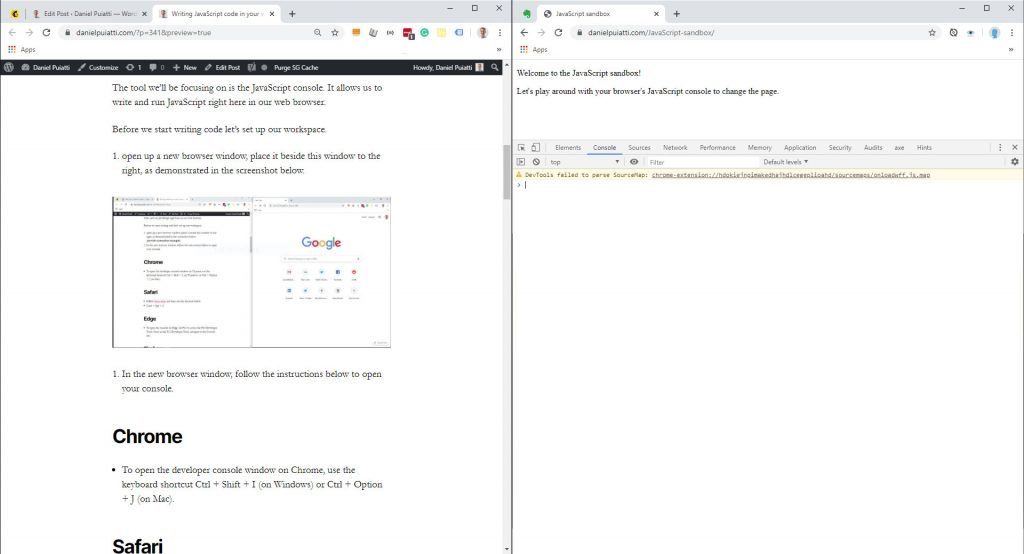
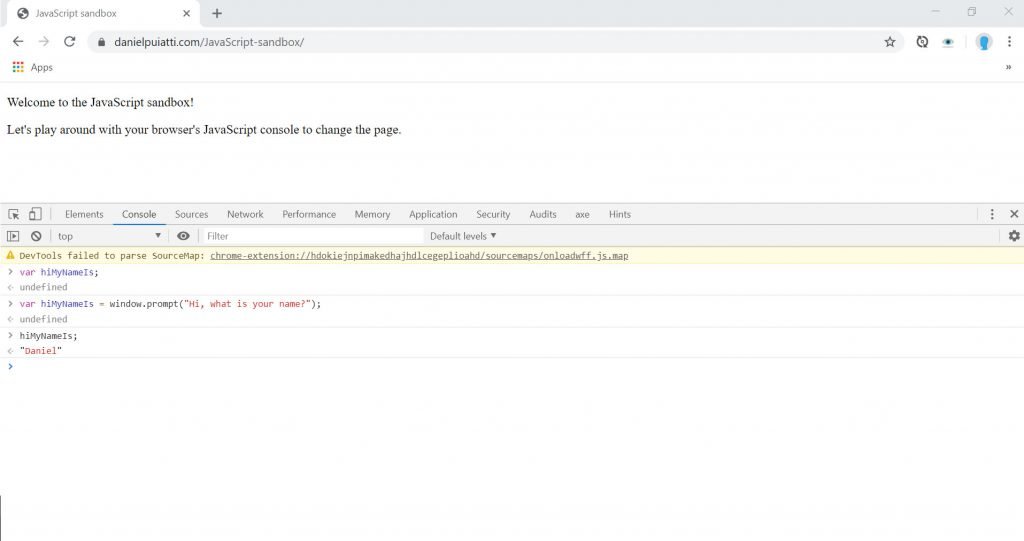
You should now see a similar layout to the screenshot below.
Writing JavaScript in the console
Ok, now that we’re all set up, let’s start with something fun. We’re going to teach your web browser what your name is. To do this we’ll need to first declare a variable to store your name. Let’s do that by creating a variable called hiMyNameIs.
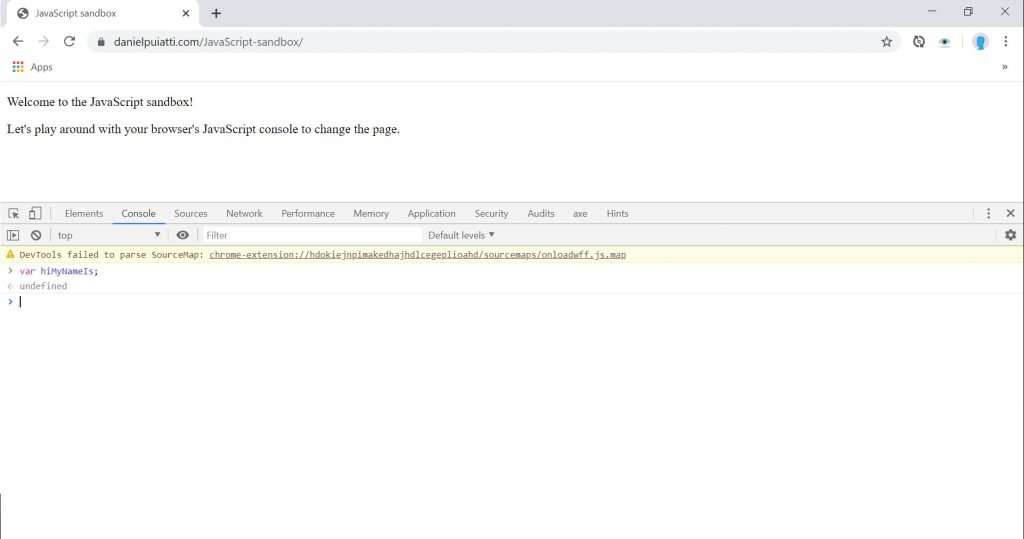
Please type the following in your JavaScript console and press enter:
var hiMyNameIs;
Your console should now look something like this:
Now, let’s create a way for you to tell the web browser what your name is. We’ll use a prompt to do this, and we’ll store the value of the prompt in the variable we just created.
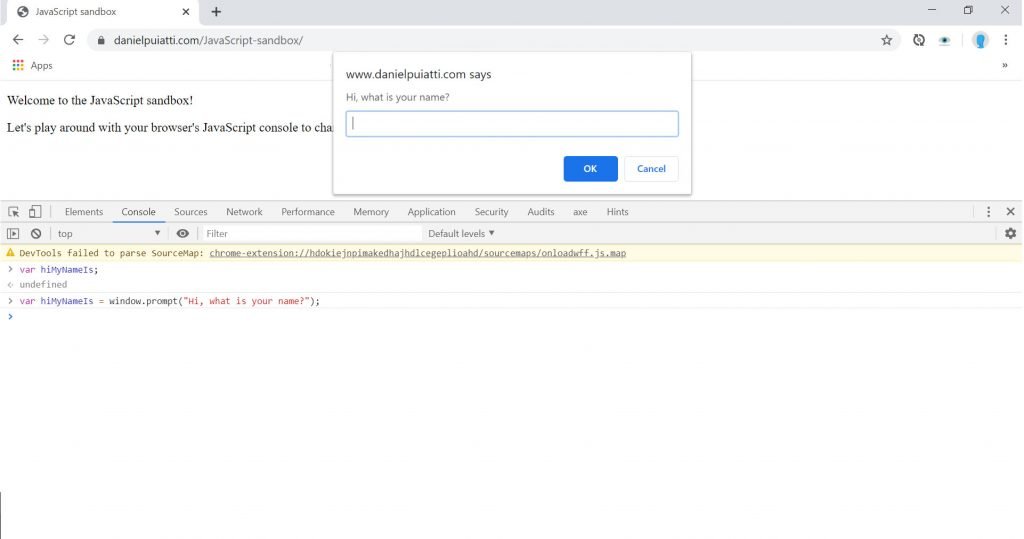
Please type the statement below into your console and press enter:
var hiMyNameIs = window.prompt("Hi, what is your name?");You should get a little popup (called a dialogue box) that asks you for your name.
Go ahead and type your name. When finished, press OK.
Let’s now confirm that your name was stored correctly by calling the named variable we just created. We can do this by using the name we gave the variable.
Please type the statement below in your console and press enter:
hiMyNameIs;
Did you see your name in the console?
Excellent, that means your browser now knows what your name is and you’ve successfully created a variable named hiMyNameIs and assigned a text string (your name) to it.
Well done!
Let’s try something more interesting. Let’s get the web browser to use your name in a greeting.
Type the statement below in your console and press enter:
alert("Hello! " + hiMyNameIs + ", It\'s nice to meet you");Hopefully, you got a little pop up like in the screenshot below.
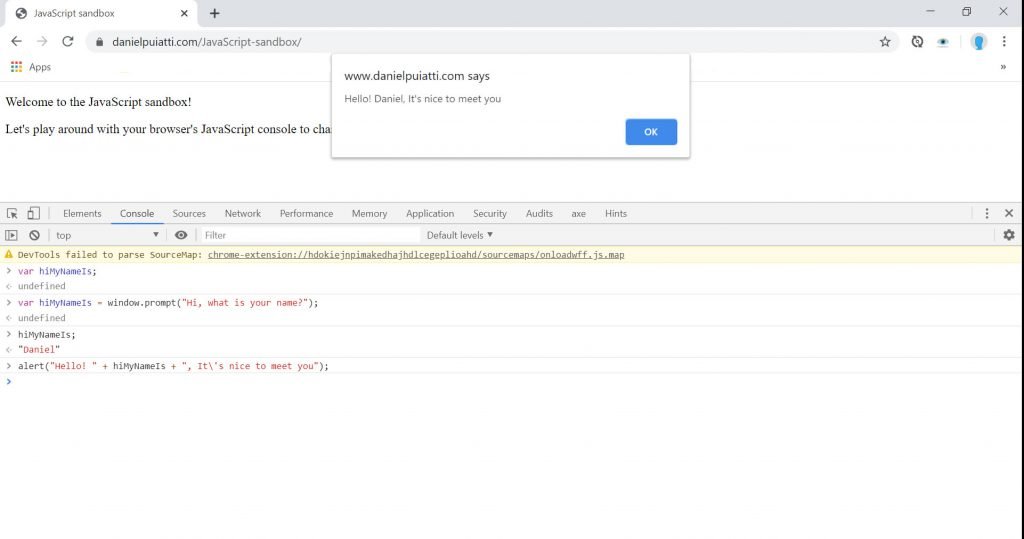
Let’s review what happened here.
When you typed alert("Hello! " + hiMyNameIs + ", It\'s nice to meet you"); you told JavaScript you wanted it to perform a function: the alert function.
When you tell JavaScript you want it to perform a function, this is referred to as calling a function. In this instance, you called the alert function which displays a popup dialogue box on the screen.
But how did JavaScript know what to display in the popup dialogue box? Easy. You told it what to display.
The content that follows alert, specifically ("Hello! " + hiMyNameIs + ", It's nice to meet you"); tells the browser that you’d like it to display everything within the () within the alert box.
The content within the () is called a parameter.
In the example:
alert("Hello! " + hiMyNameIs + ", It\'s nice to meet you");The parameter is
"Hello! " + hiMyNameIs + ", It's nice to meet you"
There is some additional syntax at play with the alert box. Specifically, you’ll notice a few interesting parts of the content within the ().
- The quotations tell the browser you want it to display text, specifically the text between the two
"". - The
+tells the browser you want to combine the content on either side of the plus symbols. hiMyNameIstells the browser to use the data stored in the variable namedhiMyNameIs.
Notice how you added words together? Pretty interesting right? This is called concatenation and it’s not adding words together, it’s combining them. Try it yourself:
alert("Hello my friend" + "It's very nice to meet you");Did you notice anything weird? Did you perhaps notice that there was no space between "Hello my friend" and "It's very nice to meet you"?
Well, you should have, because there was no space.
When you are concatenating words in JavaScript you must provide all the characters you’d like JavaScript to combine. This includes spaces.
If you want spaces between words, you’ll need to add them. You can do so by adding the space between the + or at the end of each part of the text you are concatenating.
alert("Hello my friend" + " " + "It's very nice to meet you");Or, you could do this:
alert("Hello my friend " + "It's very nice to meet you");By now your console is probably getting pretty full of stuff, let’s clear it out.
Please type the statement below in your console and press enter:
clear()
Let’s have some more fun with the content on the page. Let’s change the text on the page to I love JavaScript!
First, use the document.QuerySelector method to search the page for the ID called #site-content.
Type the statement below in your console and press enter:
document.querySelector("#site-content");Now use the innerHTML method to select the HTML within the #site-content ID
Type the statement below in your console and press enter:
document.querySelector("#site-content").innerHTML;Now set the innerHTML of the #textSelector ID to the text "I love JavaScript"
Type the statement below in your console and press enter:
document.querySelector("#site-content").innerHTML = "I love JavaScript";Pretty cool right? We used a querySelector to select a specific part of the HTML and then change it.
Manipulating HTML with JavaScript is incredibly powerful. But this is only the beginning. So far we used two actions that come by default with JavaScript. But there’s more to JavaScript than the actions that come with it.
That’s right, you guessed it. You can create your own actions, with your own set of instructions, that you can run whenever you like. You are not limited to the actions predefined by JavaScript. These custom actions are called functions, and we’ll be covering them in my next guide.
But first, let’s explore how to add JavaScript to your website.