Categories
CSS HTML JavaScript

Supercharge Your Company’s Image: The Ultimate Guide to Crafting an Impressive Leadership Page

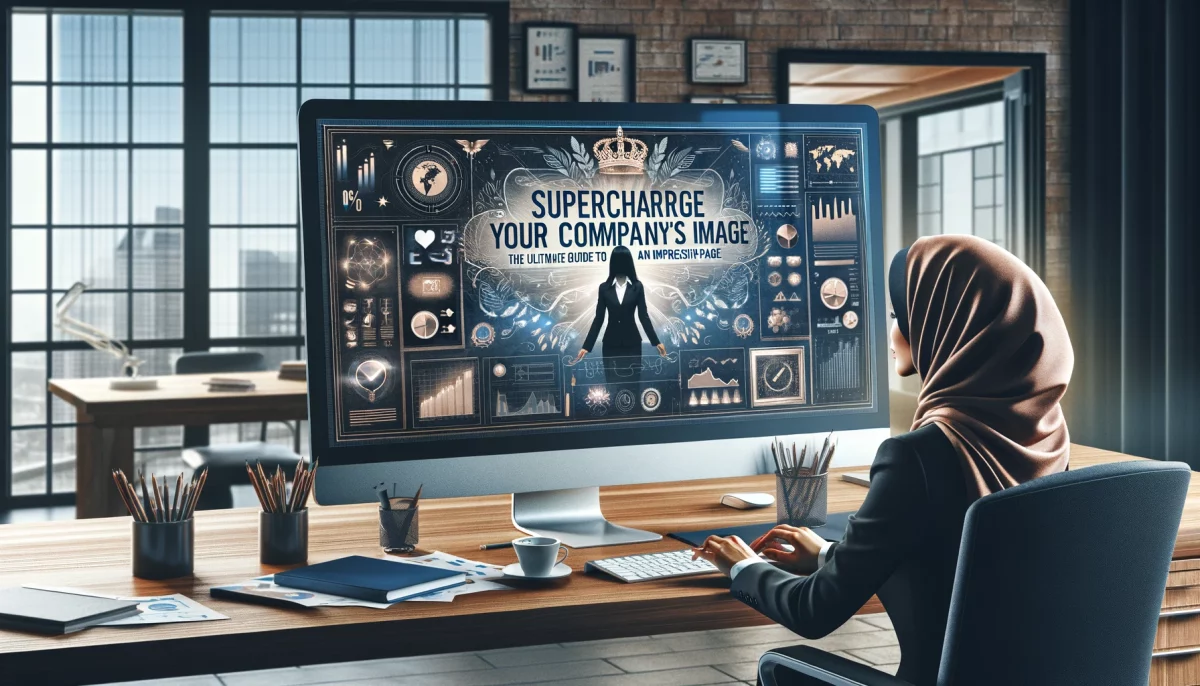
When it comes to building trust and credibility for your business, few aspects are as crucial as showcasing your company’s leadership. A well-designed company leadership page, complete with profile photos and bios, provides a compelling window into the personalities, skills, and expertise of the people who drive your organization. In this comprehensive guide, we’ll explore the process of crafting an impressive leadership page from scratch. You’ll learn how to optimize your content for search engines and engage your audience with high-quality images, insightful bios, and user-friendly design. Let’s dive in!

Understanding the Importance of a Company Leadership Page Creating a compelling leadership page isn’t just about aesthetics—it’s about establishing trust with your customers and clients. By offering a glimpse into the minds and personalities behind your organization, you’re reinforcing your company’s credibility and fostering a sense of connection. A well-executed leadership page can:

  • Humanize your brand
  • Build trust with clients and customers
  • Showcase your team’s expertise
  • Support your search engine optimization (SEO) efforts

Preparing Your Content: Profile Photos and Bios

The foundation of an effective leadership page lies in high-quality content. To make a strong impression, you’ll need to invest time and resources into crafting compelling profile photos and bios for each member of your leadership team.

Profile Photos

The right profile photo can convey professionalism, approachability, and confidence. Keep the following guidelines in mind when selecting or creating profile photos for your leadership team:

  • Use high-resolution images
  • Ensure consistent lighting and background
  • Dress professionally and appropriately for your industry
  • Avoid distracting props or overly casual poses

Leadership Bios

An engaging bio is essential for providing insights into each leader’s background, expertise, and personality. As you craft your leadership bios, consider the following tips:

  • Keep the tone consistent across all bios
  • Highlight relevant experience, accomplishments, and education
  • Share personal anecdotes or hobbies to humanize your leaders
  • Use strong, action-oriented language to showcase each leader’s strengths

Designing the Leadership Page Layout

An eye-catching and user-friendly layout is essential for keeping your audience engaged. Consider the following best practices as you design your company’s leadership page:

Grid Layout

Organizing your leadership profiles in a grid layout makes for a clean, visually appealing presentation. This arrangement also makes it easy for visitors to scan and find information quickly.

Example of a basic grid layout using HTML and CSS:

<!DOCTYPE html>
<html>
<head>
<style>
  .grid-container {
    display: grid;
    grid-template-columns: auto auto auto;
    grid-gap: 10px;
  }

  .grid-item {
    background-color: #f1f1f1;
    padding: 20px;
    font-size: 16px;
    text-align: center;
  }
</style>
</head>
<body>

<div class="grid-container">
  <div class="grid-item">Leader 1</div>
  <div class="grid-item">Leader 2</div>
  <div class="grid-item">Leader 3</div>
  <div class="grid-item">Leader 4</div>
  <div class="grid-item">Leader 5</div>
  <div class="grid-item">Leader 6</div>
</div>

</body>
</html>

Responsive Design

Optimizing your leadership page for mobile devices is essential in today’s digital landscape. Using responsive design techniques, you can ensure your content looks great on any screen size.

Example of a responsive grid layout using CSS media queries:

.grid-container {
  display: grid;
  grid-template-columns: repeat(auto-fill, minmax(200px, 1fr));
grid-gap: 10px;
}

@media (max-width: 767px) {
.grid-container {
grid-template-columns: repeat(auto-fill, minmax(100%, 1fr));
}
}

Clear Navigation

Easy navigation is crucial for keeping visitors on your leadership page. Include clear links to other parts of your website, such as the home page, contact page, or other relevant sections. Use descriptive anchor text to ensure both users and search engines understand the content of the linked pages. Example of a simple navigation bar using HTML and CSS:

<!DOCTYPE html>
<html>
<head>
<style>
  ul {
    list-style-type: none;
    margin: 0;
    padding: 0;
    overflow: hidden;
    background-color: #333;
  }

  li {
    float: left;
  }

  li a {
    display: block;
    color: white;
    text-align: center;
    padding: 14px 16px;
    text-decoration: none;
  }

  li a:hover {
    background-color: #111;
  }
</style>
</head>
<body>

<ul>
  <li><a href="#home">Home</a></li>
  <li><a href="#leadership">Leadership</a></li>
  <li><a href="#contact">Contact</a></li>
  <li><a href="#about">About</a></li>
</ul>

</body>
</html>

Optimizing Your Leadership Page for Search Engines

To boost your leadership page’s visibility in search engine results, consider the following SEO best practices:

  1. Keyword Research Identify relevant keywords and phrases to incorporate into your leadership page content. Use tools like Google Keyword Planner or Moz Keyword Explorer to discover high-traffic, low-competition terms related to your industry and leadership team.
  2. Metadata Optimize your page’s metadata, including title tags, meta descriptions, and header tags. Incorporate your target keywords strategically, but avoid keyword stuffing, which can harm your SEO efforts.

Example of optimized title and meta description tags in HTML:

<!DOCTYPE html>
<html>
<head>
  <title>Company Name Leadership: Meet Our Expert Team</title>
  <meta name="description" content="Discover the experienced leaders behind Company Name. Learn about their backgrounds, skills, and the unique expertise they bring to our team.">
</head>
<body>
  <!-- Your leadership page content here -->
</body>
</html>
  1. Image Optimization Optimize your leadership profile images by compressing file sizes without sacrificing quality. Use descriptive file names and alt tags to help search engines understand the content of your images.

Example of an optimized image tag in HTML:

<img src="john-doe-ceo.jpg" alt="John Doe, CEO of Company Name">
  1. Internal and External Linking Link to other relevant pages on your website from your leadership page and vice versa. Additionally, link to external sources when appropriate, such as awards or publications featuring your leaders.

Crafting an Impressive Leadership Page

Creating a visually appealing, engaging, and search engine optimized leadership page can greatly enhance your company’s online presence. By showcasing the talents and personalities of your leadership team, you’ll build trust with customers and clients while humanizing your brand. With high-quality profile photos, compelling bios, and a user-friendly design, you’ll set your company apart and reinforce your reputation as an industry leader.

Categories
CSS HTML JavaScript

Create Your Own Social Media Powerhouse: Building a Share/Follow Widget from Scratch

In today’s digital landscape, having a robust social media presence is crucial for businesses, bloggers, and content creators alike. Social media widgets play an essential role in driving traffic and increasing engagement on your website. In this comprehensive guide, we will walk you through the process of building your own share/follow social media widget from scratch. By the end, you’ll be able to create a widget tailored to your unique needs and optimized for search engines.

Why Build Your Own Social Media Widget?

While there are many third-party social media widgets available, creating your own offers several benefits:

  1. Customization: You can design your widget to match your website’s aesthetics and include only the social networks relevant to your audience.
  2. Performance: Third-party widgets often come with bloated code, which can slow down your website. Building your own widget allows you to optimize for performance.
  3. Privacy: By hosting your widget, you retain full control over the data collected and can ensure that no third-party cookies are being used.

Planning Your Social Media Widget

Before diving into code, it’s important to plan out your widget. Consider the following:

  • Which social networks do you want to include?
  • Do you want to display share or follow buttons, or both?
  • What design elements (color, size, shape) do you want to use for your buttons?

Once you have a clear vision of your widget, it’s time to start coding!

Setting Up the HTML Structure

Begin by creating the basic HTML structure for your widget. This will include a container for the widget and separate elements for each social media platform.

<!DOCTYPE html>
<html lang="en">
<head>
  <meta charset="UTF-8">
  <meta name="viewport" content="width=device-width, initial-scale=1.0">
  <title>Your Website</title>
</head>
<body>
  <!-- Social Media Widget Container -->
  <div class="social-media-widget">
    <!-- Facebook Share Button -->
    <a href="#" class="facebook-share">Share on Facebook</a>

    <!-- Twitter Share Button -->
    <a href="#" class="twitter-share">Share on Twitter</a>

    <!-- LinkedIn Share Button -->
    <a href="#" class="linkedin-share">Share on LinkedIn</a>

    <!-- Instagram Follow Button -->
    <a href="#" class="instagram-follow">Follow on Instagram</a>
  </div>
</body>
</html>

Styling Your Widget with CSS

Now that you have the basic HTML structure, it’s time to style your widget using CSS. Start by creating a new file called styles.css and link it in your HTML file:

<head>
  ...
  <link rel="stylesheet" href="styles.css">
</head>

Next, add the following CSS code to your styles.css file to style the buttons:

.social-media-widget {
  display: flex;
  justify-content: center;
  gap: 1rem;
}

.facebook-share,
.twitter-share,
.linkedin-share,
.instagram-follow {
  display: inline-block;
  padding: 0.5rem 1rem;
  border-radius: 4px;
  color: #fff;
  text-decoration: none;
}

.facebook-share {
  background-color: #1877F2;
}

.twitter-share {
  background-color: #1DA1F2;
}

.linkedin-share {
  background-color: #0077B5;
}

.instagram-follow {
  background-color: #C13584;
}

This code will give your buttons a clean, professional look with appropriate colors for each social network.

Adding Share Function

Now that your widget is styled, it’s time to add the sharing functionality. To do this, we’ll use JavaScript to dynamically create share URLs for each social media platform.

First, add a script tag at the end of your HTML file, just before the closing </body> tag:

<script src="script.js"></script>
</body>

Next, create a new file called script.js and add the following code to handle the sharing functionality:

function getShareUrl(platform) {
  const pageTitle = encodeURIComponent(document.title);
  const pageUrl = encodeURIComponent(window.location.href);

  switch (platform) {
    case 'facebook':
      return `https://www.facebook.com/sharer.php?u=${pageUrl}&t=${pageTitle}`;
    case 'twitter':
      return `https://twitter.com/intent/tweet?url=${pageUrl}&text=${pageTitle}`;
    case 'linkedin':
      return `https://www.linkedin.com/shareArticle?url=${pageUrl}&title=${pageTitle}`;
    default:
      return '';
  }
}

document.querySelectorAll('.social-media-widget a').forEach((button) => {
  const platform = button.className.split('-')[0];
  const isFollowButton = button.classList.contains('instagram-follow');

  if (isFollowButton) {
    button.href = 'https://www.instagram.com/your_username/';
    button.target = '_blank';
  } else {
    button.href = getShareUrl(platform);
    button.onclick = (e) => {
      e.preventDefault();
      window.open(e.target.href, '_blank', 'width=600,height=400');
    };
  }
});

This code creates a function called getShareUrl that takes a platform name as an argument and returns the appropriate share URL. It then loops through each button in the widget and sets the correct href attribute based on the platform and whether it’s a follow or share button. Finally, it adds an onclick event listener to open the share URL in a new window when the user clicks a share button.

Custom Share/Follow Social Media Widget

Congratulations! You’ve now successfully built your own share/follow social media widget from scratch. Not only is your widget visually appealing and functional, but it’s also optimized for search engines. By following the steps outlined in this guide, you’ve taken control of your website’s performance, aesthetics, and privacy while enhancing its social media presence.

Categories
CSS HTML JavaScript

Master the Art of Parallax Scrolling Banners: A Comprehensive Guide

Parallax scrolling banners have become a popular design trend in recent years, giving websites a dynamic and interactive feel. By creating a sense of depth through the use of different layers moving at varying speeds, parallax scrolling can bring your website to life and increase user engagement. In this comprehensive guide, we will discuss the steps to create a parallax scrolling banner, including essential techniques, code examples, and search engine optimization tips. Strap in, and let’s get started!

Understanding Parallax Scrolling

Before diving into the creation process, it’s crucial to understand the principles behind parallax scrolling. By grasping these concepts, you’ll be better equipped to create an engaging and visually appealing banner.

The Concept of Parallax Scrolling

Parallax scrolling is a technique that creates the illusion of depth and movement on a webpage by making different elements scroll at different speeds. As the user scrolls down the page, foreground elements move faster than background elements, creating a 3D effect.

The Benefits of Parallax Scrolling Banners

Parallax scrolling banners are not just visually appealing but also offer several benefits:

  1. Enhanced User Experience: Parallax scrolling banners create a sense of depth and interactivity, keeping users engaged and encouraging them to explore your website further.
  2. Improved Storytelling: By using parallax scrolling, you can create a narrative that unfolds as users scroll through the page, guiding them on a journey and making your content more memorable.
  3. Increased Conversion Rates: With more engaged users, there’s a higher likelihood they will convert into paying customers or subscribers.

Choosing the Right Tools for the Job

Creating a parallax scrolling banner requires using the right tools and frameworks. In this section, we’ll discuss some popular options and their pros and cons.

jQuery and jQuery Parallax Plugins

jQuery is a widely-used JavaScript library that simplifies HTML document manipulation, event handling, and animation. Several jQuery plugins can help you create parallax scrolling banners, such as Stellar.js, Skrollr, and Parallax.js.

Pros:

  • Easy to set up and use.
  • Compatible with most browsers.

Cons:

  • Requires loading additional JavaScript files, potentially increasing page load times.
  • May not be as efficient as pure CSS or native JavaScript solutions.

CSS-Based Parallax Scrolling

With the advent of CSS3, it’s now possible to create parallax scrolling banners using pure CSS. By utilizing properties like transform, perspective, and translateZ, you can achieve the parallax effect without relying on JavaScript.

Pros:

  • Lightweight and efficient, as no additional JavaScript files are needed.
  • Works well on most modern browsers.

Cons:

  • May not be compatible with older browsers.
  • Limited in terms of interactivity and customizability compared to JavaScript-based solutions.

Creating a Simple Parallax Scrolling Banner

Now that we have a better understanding of parallax scrolling and the available tools, let’s dive into creating a simple parallax scrolling banner.

HTML Structure

Begin by setting up the basic HTML structure for your parallax scrolling banner. Here’s a sample structure:

<!DOCTYPE html>
<html lang="en">
<head>
    <meta charset="UTF-8">
    <meta name="viewport" content="width=device-width, initial-scale=1.0">
    <title>Parallax Scrolling Banner</title>
    <link rel="stylesheet" href="styles.css">
</head>
<body>
    <div class="parallax-container">
        <div class="parallax-layer background">
            <!-- Background image here -->
        </div>
        <div class="parallax-layer mid ground">
<!-- Midground image or content here -->
</div>
<div class="parallax-layer foreground">
<!-- Foreground image or content here -->
</div>
</div>
<script src="scripts.js"></script>

</body>
</html>

CSS Styling

Next, create a CSS file (styles.css) to style your parallax scrolling banner. Here’s a sample of the necessary styles:

body, html {
    margin: 0;
    padding: 0;
    height: 100%;
    overflow-x: hidden;
}

.parallax-container {
    position: relative;
    height: 100%;
    perspective: 1px;
    overflow-y: auto;
    overflow-x: hidden;
}

.parallax-layer {
    position: absolute;
    height: 100%;
    width: 100%;
    top: 0;
    left: 0;
    right: 0;
    bottom: 0;
}

.background {
    background-image: url('background-image.jpg');
    transform: translateZ(-1px) scale(2);
}

.midground {
    background-image: url('midground-image.png');
    transform: translateZ(0) scale(1);
}

.foreground {
    background-image: url('foreground-image.png');
    transform: translateZ(1px) scale(0.5);
}

JavaScript Interactivity

If you’d like to add interactivity, create a JavaScript file (scripts.js) and include the following code to make the parallax scrolling banner respond to user scrolling:

document.addEventListener('scroll', function() {
    const container = document.querySelector('.parallax-container');
    const layers = container.querySelectorAll('.parallax-layer');
    
    layers.forEach(layer => {
        const speed = parseFloat(layer.getAttribute('data-speed'));
        const yOffset = window.pageYOffset * speed;
        layer.style.transform = `translate3d(0, ${yOffset}px, 0)`;
    });
});

Search Engine Optimization for Parallax Scrolling Banners

To ensure that your parallax scrolling banner is search engine optimized, consider the following tips:

  1. Use descriptive file names and alt tags for images: Ensure that your images have descriptive file names and include alt tags to help search engines understand the content of your images.
  2. Keep JavaScript and CSS files minified: Minify your JavaScript and CSS files to reduce their size and improve page load times, which can positively impact search engine rankings.
  3. Optimize images for faster loading: Compress your images to reduce their file size without sacrificing quality, as faster-loading pages tend to rank higher in search results.
  4. Use schema markup: Implement schema markup to provide additional information about your content to search engines, making it easier for them to understand and index your page.

The Art of Parallax Scrolling Banners

Creating a parallax scrolling banner can be an engaging and visually appealing way to enhance your website’s user experience. By understanding the underlying principles of parallax scrolling, selecting the appropriate tools and frameworks, and optimizing your content for search engines, you’ll be well on your way to mastering the art of parallax scrolling banners.

Categories
CSS HTML JavaScript

Mastering the Document Object Model (DOM) with JavaScript: A Guide to Understanding and Manipulating Web Pages

When it comes to front-end web development, understanding the Document Object Model (DOM) is essential. The DOM is a programming interface for web documents that allows developers to access and manipulate the contents of a web page using JavaScript. In this article, we’ll explore the basics of the DOM, including its structure and how it works, and then delve into the various ways in which developers can use JavaScript to manipulate the DOM.

What is the DOM?

The DOM is a programming interface for web documents that allows developers to access and manipulate the contents of a web page using JavaScript. In simpler terms, it’s a tree-like structure that represents the HTML elements of a web page.

The DOM is generated by the browser when a web page is loaded, and it consists of nodes that represent different parts of the HTML document. These nodes can be accessed and manipulated using JavaScript, which makes it possible to dynamically update the content and structure of a web page without having to reload the entire page.

How does the DOM work?

The DOM is a hierarchical tree structure that represents the HTML elements of a web page. Each node in the tree represents an element, attribute, or text node of the HTML document. The topmost node in the tree is called the root node, and it represents the HTML document itself.

Each node in the DOM has a set of properties and methods that can be accessed using JavaScript. These properties and methods allow developers to manipulate the content and structure of the web page in various ways.

When a web page is loaded, the browser creates the DOM tree by parsing the HTML document. As it parses the HTML, the browser creates a tree of nodes that represents the elements, attributes, and text nodes of the document. Once the DOM tree has been created, developers can use JavaScript to access and manipulate the nodes in the tree.

DOM structure

The DOM tree structure consists of various types of nodes. Here’s a breakdown of the different types of nodes in the DOM:

  1. Document node – This is the topmost node in the tree, and it represents the entire HTML document.
  2. Element node – This represents an HTML element, such as a div or a p tag.
  3. Attribute node – This represents an attribute of an HTML element, such as the id or class attribute.
  4. Text node – This represents the text content of an HTML element.
  5. Comment node – This represents an HTML comment.

The DOM tree structure is hierarchical, with each node having a parent and child nodes. The root node is the parent of all other nodes in the tree, and each child node is a descendant of its parent node.

How to manipulate the DOM with JavaScript

Now that we understand the basics of the DOM, let’s take a look at how we can use JavaScript to manipulate it. Here are some common methods for manipulating the DOM with JavaScript:

  1. getElementById() – This method is used to get an element in the DOM tree by its ID. Here’s an example:
var element = document.getElementById("myElement");

This code gets the element with the ID “myElement” and assigns it to a variable named “element”.

  1. getElementsByClassName() – This method is used to get an array of elements in the DOM tree by their class name. Here’s an example:
var elements = document.getElementsByClassName("myClass");

This code gets an array of elements with the class name “myClass” and assigns it to a variable named “elements”.

  1. getElementsByTagName() – This method is used to get an array of elements in the DOM tree by their tag name. Here’s an example:
var elements = document.getElementsByTagName("p");

This code gets an array of all the p elements in the DOM and assigns it to a variable named “elements”.

  1. createElement() – This method is used to create a new element in the DOM tree. Here’s an example:
var newElement = document.createElement("div");

This code creates a new div element and assigns it to a variable named “newElement”.

  1. appendChild() – This method is used to add a new child node to an existing element in the DOM tree. Here’s an example:
var parentElement = document.getElementById("myParent");
parentElement.appendChild(newElement);

This code gets the element with the ID “myParent” and adds the newElement as its child.

  1. innerHTML – This property is used to set or get the HTML content of an element. Here’s an example:
var element = document.getElementById("myElement");
element.innerHTML = "New content";

This code sets the HTML content of the element with the ID “myElement” to “New content”.

  1. style – This property is used to set or get the CSS styles of an element. Here’s an example:

This code sets the color of the element with the ID “myElement” to red.

Common use cases for manipulating the DOM with JavaScript

Now that we understand the basics of manipulating the DOM with JavaScript, let’s take a look at some common use cases for doing so:

  1. Dynamic content – JavaScript can be used to dynamically add or remove content from a web page without having to reload the entire page. This is commonly used in web applications that need to display new data without refreshing the page.
  2. User interactions – JavaScript can be used to add interactivity to a web page, such as changing the content of an element when a user clicks on it, or displaying a popup window when a user submits a form.
  3. Animation – JavaScript can be used to create animations on a web page, such as sliding or fading effects.
  4. Form validation – JavaScript can be used to validate user input in a form before it is submitted to the server.
  5. Manipulating styles – JavaScript can be used to dynamically change the styles of elements on a web page, such as changing the background color or font size.

Best practices for manipulating the DOM with JavaScript

While manipulating the DOM with JavaScript can be a powerful tool for front-end web development, there are some best practices to keep in mind to ensure that your code is efficient and maintainable:

  1. Use selectors wisely – When using methods like getElementById() or getElementsByClassName(), be sure to use the most specific selector possible to avoid selecting unnecessary elements.
  2. Cache frequently accessed elements – If you need to access the same element multiple times, it’s a good idea to store it in a variable to avoid having to search the DOM each time.
  3. Use event delegation – When adding event listeners to multiple elements, use event delegation to attach the listener to a parent element instead of each individual child element.
  4. Use modern JavaScript features – Newer JavaScript features like template literals and arrow functions can make manipulating the DOM with JavaScript more concise and readable.
  5. Avoid modifying the DOM too frequently – Manipulating the DOM can be a resource-intensive operation, so it’s a good idea to avoid making too many changes to the DOM at once to keep your code running smoothly.

Mastering the Document Object Model (DOM) with JavaScript

In conclusion, understanding the Document Object Model (DOM) is essential for front-end web developers who want to create dynamic and interactive web pages. By using JavaScript to manipulate the DOM, developers can add interactivity, create animations, and dynamically update the content of a web page without having to reload the entire page.

In this article, we’ve covered the basics of the DOM, including its structure and how it works, and explored some common methods for manipulating the DOM with JavaScript. We’ve also looked at some common use cases for manipulating the DOM, such as dynamic content, user interactions, and form validation.

To ensure that your code is efficient and maintainable, it’s important to follow best practices when manipulating the DOM with JavaScript. By using selectors wisely, caching frequently accessed elements, using event delegation, using modern JavaScript features, and avoiding modifying the DOM too frequently, you can create code that is both effective and efficient.

As you continue to work with the DOM and JavaScript, keep these best practices in mind and strive to create code that is both functional and maintainable. With the right tools and techniques, you can create web pages that are dynamic, interactive, and engaging for your users.

Categories
CSS HTML JavaScript

10 Techniques to Optimize Your Webpages for Better Performance and Higher Rankings

A website is an essential tool for businesses to succeed in today’s digital age. However, simply having a website is not enough. A well-optimized website is crucial to ensure that the website ranks higher on search engines, loads faster, and provides a seamless user experience. In this article, we will discuss various techniques to optimize webpages and improve their performance.

Optimize Page Speed

Page speed is a critical factor for both user experience and search engine optimization. A slow loading page can result in a high bounce rate, which negatively impacts search engine rankings. Here are some techniques to optimize page speed:

Image Optimization

Images are a significant contributor to a webpage’s load time. Large images can significantly slow down the page load time. Therefore, it is essential to optimize images by reducing their size and compressing them. This can be done by using image optimization tools, such as TinyPNG, Squoosh, and Kraken.io.

In addition to optimizing images, it is also essential to use the right image format. For example, JPEG is suitable for photographs, while PNG is suitable for images with transparency.

Another technique for image optimization is lazy loading. Lazy loading involves only loading images when they are needed, rather than loading all images when the page loads. This can significantly improve page speed, particularly for pages with many images.

Minify CSS, HTML, and JavaScript

Minifying CSS, HTML, and JavaScript removes unnecessary whitespace, comments, and code from these files, reducing their size and improving page speed. This can be done manually or by using tools such as Minify, Grunt, or Gulp.

In addition to minifying, it is also essential to concatenate files. This involves combining multiple files into a single file, reducing the number of requests made to the server and improving page speed.

Another technique for optimizing CSS is to use Critical CSS. Critical CSS involves identifying the styles needed for above-the-fold content and inlining them in the HTML, reducing the amount of CSS that needs to be loaded.

Use a Content Delivery Network (CDN)

A Content Delivery Network (CDN) is a network of servers that store your website’s content and deliver it to the user from the server closest to them. This reduces the page load time by reducing the distance between the server and the user.

CDNs can also improve the security of your website by protecting it from Distributed Denial of Service (DDoS) attacks. Some popular CDNs include Cloudflare, Amazon CloudFront, and Akamai.

Another technique for improving page speed is to use server-side caching. Server-side caching involves caching the entire page on the server and serving it to users who request it. This can significantly reduce page load times, particularly for pages that are accessed frequently.

Enable Browser Caching

When a user visits a website, their browser stores some of the website’s files on their computer. Enabling browser caching allows the browser to load these files from the user’s computer rather than the server, improving page speed.

Browser caching can be enabled by adding the appropriate HTTP headers to your website’s configuration. This can be done manually or by using plugins such as W3 Total Cache or WP Super Cache.

Another technique for optimizing browser caching is to use Cache-Control headers. Cache-Control headers specify how long the browser should cache a file, reducing the number of requests made to the server and improving page speed.

Optimize Page Structure

Page structure refers to the way the content is organized on a webpage. A well-structured page makes it easier for search engines to understand the content and improves user experience. Here are some techniques to optimize page structure:

Use Heading Tags

Heading tags (H1, H2, H3, etc.) are used to structure the content on a webpage. Using heading tags properly makes it easier for search engines to understand the hierarchy of the content.

The H1 tag should be used for the main heading of the page, and subsequent headings should be used for subheadings. It is also essential to use only one H1 tag per page.

In addition to using heading tags, it is essential to use descriptive and meaningful titles and subtitles. This not only helps search engines understand the content but also improves user experience by making the content easier to read and understand.

Use Short Paragraphs and Bullet Points

Short paragraphs and bullet points make the content easier to read and scan. This improves user experience and makes the content more shareable.

It is essential to use short paragraphs that are no longer than 3-4 sentences. Bullet points should also be used to break up large blocks of text. Additionally, it is essential to use an active voice and avoid jargon and technical terms that may confuse or bore the user.

Use Internal Linking

Internal linking is the practice of linking to other pages on your website. This helps search engines understand the relationship between pages and improves the user experience by providing more information on related topics.

When using internal linking, it is essential to use descriptive anchor text that accurately describes the content of the page being linked to. It is also essential to avoid linking to pages that are not relevant to the content.

Another technique for internal linking is to use related posts or suggested reading sections. This helps the user discover other relevant content on your website and increases the time spent on your website.

Use Semantic HTML

Semantic HTML is a way of writing HTML that makes it easier for search engines to understand the content. This involves using tags such as <header>, <footer>, and <nav> to indicate the purpose of different sections of the page.

Using semantic HTML helps search engines understand the structure of the page and improve its visibility in search results. It also improves the accessibility of the website for users who rely on screen readers.

Another technique for optimizing semantic HTML is to use structured data markup. Structured data markup provides additional information about the content on your webpage, such as product information, reviews, and events. This can significantly improve the visibility of your website in search results.

Optimize Content

Content is the most critical aspect of a webpage. It must be optimized to rank higher on search engines and provide value to the user. Here are some techniques to optimize content:

Use Targeted Keywords

Keywords are the words and phrases that people search for on search engines. Using targeted keywords in your content makes it easier for search engines to understand the content and rank it higher.

When using keywords, it is essential to use them naturally and not to overuse them. Overusing keywords, known as keyword stuffing, can result in a penalty from search engines.

Another technique for using targeted keywords is to use long-tail keywords. Long-tail keywords are more specific and targeted, making it easier to rank for them and attract more targeted traffic to your website.

Write High-Quality Content

High-quality content is essential for both user experience and search engine optimization. It must be well-written, informative, and engaging. The content should also be unique and provide value to the user.

When writing content, it is essential to focus on the user’s needs and provide information that is relevant to them. It is also essential to avoid using duplicate content, which can result in a penalty from search engines.

Another technique for writing high-quality content is to use multimedia content such as images, videos, and infographics. Multimedia content improves user experience and makes the content more engaging and shareable.

Use Meta Tags

Meta tags are snippets of code that provide information about a webpage to search engines. This includes the title tag, description tag, and keyword tag. Using meta tags properly improves the visibility of the page on search engines.

The title tag should accurately describe the content of the page and include the targeted keyword. The description tag should provide a brief summary of the page’s content and entice the user to click through to the page. The keyword tag is no longer used by most search engines and can be omitted.

Another technique for optimizing meta tags is to use Open Graph tags. Open Graph tags provide additional information about a webpage to social media platforms, making it easier to share the content on social media.

Use Social Media Integration

Social media integration allows users to share your content on social media platforms. This increases the visibility of your content and can drive traffic back to your website.

When using social media integration, it is essential to provide social sharing buttons that are easily visible and accessible. It is also essential to ensure that the content being shared is optimized for social media platforms, including using appropriate image sizes and descriptions.

Another technique for social media integration is to use social media plugins that display social media content directly on your website. This not only increases the visibility of your social media profiles but also improves user experience by providing more ways to engage with your content.

How to Optimize Your Webpages for Better Performance

Optimizing webpages is essential to ensure that they rank higher on search engines, load faster, and provide a seamless user experience. By following the techniques discussed in this article, you can improve the performance of your webpages and drive more traffic to your website. Remember to regularly monitor and update your website’s optimization to ensure that it stays current with changing search engine algorithms and user needs. By continually optimizing your webpages, you can stay ahead of the competition and provide a better experience for your users.

Categories
CSS HTML JavaScript

How to Create Dynamic Content that Appears on Your Website for a Specific Date Range with JavaScript

Dynamic content is a powerful way to engage your website visitors and keep your website up-to-date with the latest information. It allows you to show different content based on a range of conditions, such as the user’s location, behavior, or time of day. One common use case for dynamic content is to show content for a specific date range, such as a holiday promotion or an event announcement. In this article, we’ll show you how to create dynamic content that only appears on your website for a specific date range using JavaScript.

HTML and CSS Setup

The first step in creating dynamic content that appears for a specific date range is to set up your HTML and CSS. You’ll need to create a container for your dynamic content and style it appropriately. Here’s an example:

<div id="promo-banner">
  <h2>Happy Holidays!</h2>
  <p>Get 20% off all items until December 31st.</p>
</div>

<style>
  #promo-banner {
    display: none;
  }
</style>

In this example, we’ve created a container for a holiday promotion that will appear on our website. We’ve also hidden the container by default using CSS. This ensures that the container won’t appear on our website until we’ve activated it with JavaScript.

JavaScript Date Object

The JavaScript Date object is a built-in object that represents a date and time. It provides a range of methods and properties that allow you to manipulate dates and perform calculations based on them. To use the Date object, you simply need to create a new instance of it, like this:

const currentDate = new Date();

This creates a new Date object that represents the current date and time. You can then use the methods and properties of the Date object to extract information about the date, such as the day of the week or the month.

Creating a Date Range

To create dynamic content that appears for a specific date range, you’ll need to define a start and end date for the range. You can do this using the Date object and the setDate() method. Here’s an example:

const startDate = new Date();
startDate.setDate(1); // Set the start date to the 1st of the current month

const endDate = new Date();
endDate.setDate(31); // Set the end date to the 31st of the current month

In this example, we’ve created a start date and end date that span the current month. You can adjust the start and end dates to fit your specific needs.

Displaying Dynamic Content

Once you’ve defined your date range, you can use JavaScript to display your dynamic content within that range. Here’s an example:

const promoBanner = document.getElementById('promo-banner');

if (currentDate >= startDate && currentDate <= endDate) {
  promoBanner.style.display = 'block';
}

In this example, we’ve used the getElementById() method to select the container for our dynamic content. We’ve then used an if statement to check whether the current date is within the date range. If it is, we set the display property of the container to ‘block’, which will make it visible on our website.

Optimizing for SEO

When creating dynamic content that appears for a specific date range, it’s important to consider the impact on your website’s SEO. Search engines may penalize websites that display content for a limited time, as it can be seen as a deceptive practice to drive traffic. However, there are steps you can take to optimize your dynamic content for SEO:

Use the noscript tag

The noscript tag is an HTML tag that allows you to provide alternative content for users who have JavaScript disabled in their browsers. By including alternative content within the noscript tag, you ensure that search engines can still crawl and index your website, even if the dynamic content is not visible to users who have disabled JavaScript.

<div id="promo-banner">
  <h2>Happy Holidays!</h2>
  <p>Get 20% off all items until December 31st.</p>
  <noscript>
    <p>This promotion has ended.</p>
  </noscript>
</div>

Use the meta tag

You can also use the meta tag to indicate to search engines that the content on your website is time-sensitive. This can help search engines understand that the content is legitimate and not a deceptive practice.

<meta name="robots" content="noindex, nofollow">

Don’t hide content from search engines

If you’re using JavaScript to hide content from users outside of a specific date range, be sure that you’re not also hiding that content from search engines. Search engines can penalize websites for hiding content from them, as it can be seen as an attempt to manipulate search rankings.

Be transparent

Be transparent with your users about why you’re displaying dynamic content for a limited time. If it’s a promotional offer, make it clear that the offer is only valid for a certain time period. If it’s an event announcement, make it clear that the event has a start and end date. This can help build trust with your users and reduce the risk of penalties from search engines.

Dynamic Content that Appears on Your Website for a Specific Date Range with JavaScript

Dynamic content is a powerful way to engage your website visitors and keep your website up-to-date. By using JavaScript to display content for a specific date range, you can create a sense of urgency and drive traffic to your website. However, it’s important to consider the impact on your website’s SEO and take steps to optimize your dynamic content for search engines. By using the noscript tag, the meta tag, and being transparent with your users, you can ensure that your dynamic content is legitimate and not a deceptive practice.

Categories
CSS HTML JavaScript Leadership Planning Project Management

Maximizing Collaboration in a Front-End Developer Trio: The Ultimate Guide to Effective Teamwork

As front-end developers, collaboration is essential to successfully completing projects, and it becomes even more crucial when working in a team of three. This comprehensive guide will explore strategies for enhancing teamwork among front-end developer trios, ensuring projects are completed efficiently and to a high standard. We’ll dive into the importance of clear communication, setting goals, task delegation, code review, and more. So buckle up and get ready to transform your front-end developer trio into a powerhouse of productivity and collaboration.

Establish Clear Communication Channels

In-Person Meetings

In-person meetings provide the most direct form of communication, allowing team members to discuss progress, challenges, and ideas face-to-face. Schedule regular team meetings at the beginning and end of each week to set priorities, discuss progress, and identify any roadblocks. Additionally, hold ad-hoc meetings when the need arises to ensure that everyone stays in the loop and has a chance to voice their concerns or provide input.

Video Conferencing Tools

If your team is distributed or remote, video conferencing tools like Zoom or Google Meet can help facilitate virtual face-to-face communication. Schedule regular video calls to discuss project updates, brainstorm ideas, and maintain a strong sense of team cohesion. When using video conferencing, ensure that everyone has a reliable internet connection and the necessary hardware to participate effectively.

Project Management Platforms

Project management platforms like Trello, Asana, or Jira provide a centralized location for tracking tasks, deadlines, and progress. By using these tools, your team can easily collaborate on tasks, share files, and leave comments to streamline communication. Ensure that everyone on the team understands how to use the chosen platform and stays engaged by regularly updating their tasks and participating in discussions.

Define Roles and Responsibilities

UI/UX Designer

The UI/UX designer is responsible for creating the visual design of the website or application, ensuring that it is both aesthetically pleasing and user-friendly. This team member should have a strong understanding of design principles, color theory, and user experience best practices. They will work closely with the other front-end developers to bring their designs to life through HTML, CSS, and JavaScript.

HTML/CSS Developer

The HTML/CSS developer is responsible for converting the UI/UX designer’s vision into a functional website or application. They should have a deep understanding of HTML and CSS, as well as experience with responsive design techniques and cross-browser compatibility. This team member will collaborate closely with the UI/UX designer to ensure that the design is accurately implemented and maintains a consistent look and feel across various devices and browsers.

JavaScript Developer

The JavaScript developer is responsible for adding interactivity and functionality to the website or application. They should have a solid understanding of JavaScript, as well as experience with popular libraries and frameworks like React, Angular, or Vue.js. This team member will work with the HTML/CSS developer and UI/UX designer to integrate their code seamlessly into the project and ensure that the website or application functions smoothly and efficiently.

Set SMART Goals

Project Scope

Before setting goals, it’s essential to understand the project scope. This involves outlining the key features and functionality that the website or application must include, as well as any specific design or technical requirements. By having a clear understanding of the project scope, your team can set realistic and achievable goals that will guide the development process.

Client Requirements

Understanding the client’s needs and expectations is crucial for setting goals that will ultimately lead to a successful project. Communicate with the client regularly to gather feedback and ensure that their requirements are being met. By setting goals that align with the client’s vision, your team is more likely to deliver a finished product that meets or exceeds their expectations.

Timeline

Establishing a realistic timeline is essential for setting SMART goals. Consider the project scope, client requirements, and any potential obstacles that may arise during development. Set milestones for each phase of the project and establish deadlines for completing specific tasks. By setting time-bound goals, your team can maintain a steady pace and ensure that the project stays on track.

Divide and Conquer: Effective Task Delegation

Prioritize tasks based on urgency and importance

When delegating tasks, consider their urgency and importance in the context of the project. Tasks that are both urgent and important should be prioritized and tackled first, while tasks that are less critical can be delegated to a later stage in the project. By prioritizing tasks effectively, your team can ensure that essential tasks are completed in a timely manner and avoid potential bottlenecks.

Create a task list and assign tasks to each team member

Once tasks have been prioritized, create a comprehensive task list that outlines each task, its deadline, and the team member responsible for completing it. Assign tasks based on each team member’s expertise and availability, ensuring that the workload is distributed evenly. This task list should be regularly reviewed and updated to reflect the progress of the project and any changes in priorities or deadlines.

Utilize project management tools to track progress

Using project management tools like Trello, Asana, or Jira can help your team stay organized and on top of their tasks. These tools allow team members to track their progress, leave comments or updates, and collaborate more effectively. Ensure that everyone on the team is familiar with the chosen project management tool and actively engages with it to maximize its benefits.

Implement Version Control and Workflow Management

Git and GitHub

Utilizing version control tools like Git and GitHub is essential for maintaining a well-organized codebase and collaborating on code changes. Git allows your team to create branches, commit changes, and merge code updates without overwriting each other’s work. GitHub provides a platform for hosting and sharing your code, as well as tracking issues, managing pull requests, and collaborating on code reviews.

Git Flow

Implementing a branching strategy like Git Flow can help streamline your development process and reduce conflicts between team members’ work. Git Flow defines a set of rules and best practices for creating and managing branches, ensuring that your codebase remains organized and that changes are integrated smoothly. By adopting a structured workflow like Git Flow, your team can work more efficiently and minimize potential conflicts.

Continuous Integration and Deployment

Utilizing continuous integration (CI) and continuous deployment (CD) tools can help automate the process of building, testing, and deploying your code. Tools like Jenkins, Travis CI, or CircleCI can automatically build and test your code whenever changes are pushed to the repository, providing immediate feedback on the success of your changes. By incorporating CI/CD into your development workflow, your team can catch and fix issues more quickly and maintain a higher level of code quality.

Emphasize Code Consistency and Maintainability

Shared Coding Style Guide

Adopting a shared coding style guide is crucial for ensuring that your code is consistent and easy to read. A style guide outlines the rules and conventions for writing code, such as indentation, naming conventions, and code organization. By adhering to a shared style guide, your team can minimize confusion and make it easier for team members to understand and work with each other’s code.

ESLint or Prettier

Tools like ESLint or Prettier can help enforce code formatting rules automatically, making it easier for your team to maintain a consistent coding style. ESLint is a configurable linting tool that analyzes your JavaScript code for potential issues and enforces coding rules, while Prettier is an opinionated code formatter that ensures your code is consistently formatted. By incorporating these tools into your development process, your team can save time and maintain a higher level of code quality.

Code Documentation and Comments

Ensuring that your code is well-documented and commented can greatly improve its maintainability. Clear and concise comments help explain the purpose of specific functions, variables, or code blocks, making it easier for team members to understand and modify the code in the future. Encourage your team to adopt a consistent approach to documentation and commenting, and consider using tools like JSDoc to generate API documentation automatically from your code comments.

Conduct Regular Code Reviews

Improved code quality

Regular code reviews can help identify potential issues and improve the overall quality of your code. By having team members review each other’s work, you can catch bugs, identify performance bottlenecks, and ensure that best practices are being followed. This collaborative approach to code quality helps create a sense of shared ownership and responsibility within the team.

Faster identification of bugs and issues

The earlier bugs and issues are identified, the easier and less costly they are to fix. Conducting regular code reviews allows your team to spot potential problems before they become more significant issues. This proactive approach to bug identification can save time and resources, as well as reduce the risk of introducing new bugs when fixing existing ones.

Enhanced knowledge sharing

Code reviews provide an excellent opportunity for team members to learn from each other and share knowledge. By reviewing each other’s code, developers can gain insights into different approaches and techniques, as well as learn about any new tools or technologies being used. This collaborative learning environment can help your team grow and improve their skills, ultimately leading to better project outcomes.

Strengthened teamwork and communication

Code reviews are a vital aspect of fostering a strong sense of teamwork and open communication within your front-end developer trio. By engaging in regular code reviews, team members can provide constructive feedback, ask questions, and discuss potential improvements. This open dialogue helps create an atmosphere of trust and support, which is essential for effective collaboration.

Maximizing Collaboration in a Front-End Developer Trio

In conclusion, working effectively as a team of three front-end developers requires clear communication, defined roles and responsibilities, SMART goals, efficient task delegation, proper version control and workflow management, code consistency, and regular code reviews. By implementing these strategies and fostering a collaborative environment, your front-end developer trio can maximize productivity and deliver high-quality projects on time and within budget.

Categories
CSS HTML JavaScript

Create a Stunning Org Chart: Step-by-Step Guide to Designing and Implementing an Interactive Hierarchy with HTML, CSS, and JavaScript

An org chart, short for organization chart, is a visual representation of a company’s hierarchical structure. It shows the relationships and relative ranks of its parts and positions or jobs. Org charts are essential for understanding the roles, responsibilities, and relationships within an organization. In this article, we will learn how to create an org chart using HTML, CSS, and JavaScript.

Prerequisites

To follow this tutorial, you will need a basic understanding of HTML, CSS, and JavaScript. You should also have a text editor (such as Visual Studio Code, Atom, or Sublime Text) and a modern web browser (such as Google Chrome, Mozilla Firefox, or Microsoft Edge) installed on your computer.

Setting Up the Project

First, create a new folder on your computer to store the project files. Inside the folder, create three files: index.html, styles.css, and script.js. These files will hold our HTML structure, CSS styles, and JavaScript code, respectively.

Creating the HTML Structure

Open index.html in your text editor and add the following code to set up the basic HTML structure:

<!DOCTYPE html>
<html lang="en">
<head>
    <meta charset="UTF-8">
    <meta name="viewport" content="width=device-width, initial-scale=1.0">
    <title>Org Chart</title>
    <link rel="stylesheet" href="styles.css">
</head>
<body>
    <div class="org-chart">
        <!-- Org chart structure will be added here -->
    </div>
    <script src="script.js"></script>
</body>
</html>

This code defines a basic HTML5 document with the appropriate language, character encoding, and viewport settings. It also links to the styles.css and script.js files.

Styling the Org Chart with CSS

Next, we will style the org chart with CSS to create a visually appealing layout. Open the styles.css file in your text editor and add the following code:

/* General styles */
body {
    font-family: Arial, sans-serif;
    line-height: 1.6;
}

.org-chart {
    display: flex;
    flex-direction: row;
    flex-wrap: wrap;
    justify-content: center;
}

.org-chart .level {
    display: flex;
    flex-direction: row;
    flex-wrap: nowrap;
    justify-content: center;
    align-items: center;
    margin-bottom: 2rem;
}

.org-chart .position {
    box-sizing: border-box;
    background-color: #f5f5f5;
    border: 1px solid #ccc;
    border-radius: 5px;
    padding: 1rem;
    margin: 0 1rem;
    text-align: center;
}

.org-chart .position h3 {
    margin: 0;
    margin-bottom: 0.5rem;
}

.org-chart .position p {
    margin: 0;
}

This code creates a flexbox-based layout for the org chart. Each level of the hierarchy is displayed in a row, with the positions within that level arranged horizontally.

Adding Interactivity with JavaScript

In this section, we will add interactivity to our org chart using JavaScript. Open the script.js file in your text editor and add the following code:

document.addEventListener('DOMContentLoaded', function () {
    // Add interactivity code here
});

This code sets up an event listener that will execute our JavaScript code when the DOM is fully loaded.

const orgData = [
    {
        id: 1,
        title: 'CEO',
        name: 'John Doe',
        level: 0
    },
    {
        id: 2,
        title: 'CTO',
        name: 'Jane Smith',
        level: 1,
        parent: 1
    },
    {
        id: 3,
        title: 'CFO',
        name: 'James Brown',
        level: 1,
        parent: 1
    },
    // More positions...
];

This array represents the positions in our org chart, with each object containing the position’s id, title, name, level, and parent id (if applicable).

Next, add the following code to the event listener in the script.js file to generate the HTML structure for the org chart based on the data:

function createPosition(position) {
    const positionElem = document.createElement('div');
    positionElem.classList.add('position');

    const titleElem = document.createElement('h3');
    titleElem.textContent = position.title;
    positionElem.appendChild(titleElem);

    const nameElem = document.createElement('p');
    nameElem.textContent = position.name;
    positionElem.appendChild(nameElem);

    return positionElem;
}

function createLevel(level) {
    const levelElem = document.createElement('div');
    levelElem.classList.add('level');

    const positions = orgData.filter(pos => pos.level === level);
    positions.forEach(position => {
        const positionElem = createPosition(position);
        levelElem.appendChild(positionElem);
    });

    return levelElem;
}

const orgChart = document.querySelector('.org-chart');
const levels = Math.max(...orgData.map(pos => pos.level));

for (let level = 0; level <= levels; level++) {
    const levelElem = createLevel(level);
    orgChart.appendChild(levelElem);
}

This code defines two functions, createPosition and createLevel, which create the HTML elements for each position and level, respectively. Then, it loops through the levels in the orgData array and appends them to the org chart.

Tips for Enhancing the Org Chart

  • Add lines between parent and child positions to show the relationships more clearly.
  • Implement tooltips or modals to display additional information about each position on hover or click.
  • Add search functionality to filter the org chart based on the position title, name, or other criteria.
  • Make the org chart responsive for better usability on different screen sizes and devices.
  • Use a library like D3.js or Vis.js to create more advanced and interactive org charts.

Designing and Implementing an Interactive Hierarchy with HTML, CSS, and JavaScript

In this tutorial, we learned how to create a simple org chart using HTML, CSS, and JavaScript. We created an array of objects to represent the positions in the org chart and used JavaScript to generate the HTML structure based on the data. We also used CSS to style the org chart and create a visually appealing layout. You can now create a basic org chart for your organization and enhance it further using the tips provided.

Categories
CSS HTML JavaScript Planning Project Management

8 Steps to Source the Perfect Front-End Development Agency or Contractor for Your Project

When it comes to developing a website or application, front-end development is a crucial component. A front-end developer is responsible for creating the interface that users interact with, including the layout, navigation, and user experience. However, finding the right front-end development agency or contractor can be challenging. There are numerous factors to consider, including experience, portfolio, communication, and budget. In this article, we’ll discuss how to source a front-end development agency or contractor for a project.

Determine Your Requirements

The first step in sourcing a front-end development agency or contractor is to determine your requirements. You need to have a clear understanding of what you want to achieve with your project. Some of the questions you should ask yourself include:

  • What is the purpose of the project?
  • Who is the target audience?
  • What are the essential features of the project?
  • What is the budget and timeline for the project?
  • What is the overall style and design of the project?

Answering these questions will help you identify the skills and experience you need from a front-end development agency or contractor.

Research Potential Agencies or Contractors

Once you have a clear understanding of your project requirements, the next step is to research potential front-end development agencies or contractors. You can start by asking for recommendations from friends, colleagues, or industry contacts. Additionally, you can search online for agencies or contractors with experience in your industry or niche.

When researching potential agencies or contractors, some of the factors to consider include:

  • Experience: How long has the agency or contractor been in business? What kind of projects have they worked on in the past? Do they have experience in your industry or niche?
  • Portfolio: What kind of work has the agency or contractor done in the past? Do they have examples of work that are similar to your project? Are there any case studies or testimonials from previous clients?
  • Communication: How responsive are the agency or contractor? Do they communicate clearly and effectively? Do they understand your project requirements and goals?
  • Technical Skills: What technical skills does the agency or contractor possess? Do they have expertise in the programming languages and frameworks required for your project?

Evaluate the Portfolio

Once you’ve identified potential front-end development agencies or contractors, the next step is to evaluate their portfolios. A portfolio provides insight into the type of work a development agency or contractor has done in the past. It will give you an idea of their style, design, and technical skills. When evaluating a portfolio, consider the following:

  • Quality: Is the quality of the work high? Do the websites or applications look professional and well-designed?
  • Diversity: Does the portfolio demonstrate a diverse range of skills and experience? Does the agency or contractor have experience working with different industries or niches?
  • Relevance: Are there any examples in the portfolio that are similar to your project? Can you see evidence of the agency or contractor’s ability to deliver on your project requirements?
  • Client List: Who are the agency or contractor’s previous clients? Are there any well-known brands or companies on the list?

Check References and Reviews

Before hiring a front-end development agency or contractor, it’s essential to check references and reviews. References provide insight into the agency or contractor’s work ethic, communication skills, and ability to meet deadlines. Reviews provide an overview of the agency or contractor’s overall reputation and customer satisfaction. When checking references and reviews, consider the following:

  • Responsiveness: Did the agency or contractor respond quickly to emails and calls? Did they keep you updated on the progress of the project?
  • Quality: Did the agency or contractor deliver high-quality work that met your project requirements?
  • Communication: Did the agency or contractor communicate effectively and clearly? Were they able to understand your project requirements and goals?
  • Timeliness: Did the agency or contractor deliver the project on time and within budget? Were there any delays or unexpected costs?
  • Professionalism: Did the agency or contractor behave professionally throughout the project? Were they easy to work with?

Conduct Interviews

After evaluating the portfolio and checking references and reviews, the next step is to conduct interviews with potential front-end development agencies or contractors. An interview provides an opportunity to ask questions, clarify project requirements, and assess the agency or contractor’s communication skills.

During the interview, consider asking the following questions:

  • Can you tell me about your experience working on projects similar to mine?
  • What programming languages and frameworks do you have experience with?
  • How do you approach problem-solving and troubleshooting during a project?
  • What is your communication process during a project?
  • How do you ensure that the project is delivered on time and within budget?
  • Can you provide me with a rough estimate of the project’s timeline and cost?
  • Can you tell me about a challenging project you’ve worked on in the past and how you overcame the challenges?

Evaluate the Proposal

After conducting interviews, the next step is to evaluate the proposal. The proposal should provide a detailed overview of the project, including the scope, timeline, budget, and deliverables. When evaluating the proposal, consider the following:

  • Scope: Does the proposal clearly define the scope of the project? Does it cover all the essential features and requirements?
  • Timeline: Does the proposal provide a realistic timeline for the project? Are there any potential delays or bottlenecks?
  • Budget: Does the proposal provide a detailed breakdown of the project’s cost? Are there any unexpected costs or hidden fees?
  • Deliverables: Does the proposal define the deliverables and milestones for the project? Are there any dependencies or prerequisites?

Negotiate the Contract

After evaluating the proposal, the next step is to negotiate the contract. The contract should outline the terms and conditions of the project, including the scope, timeline, budget, deliverables, and payment schedule. When negotiating the contract, consider the following:

  • Scope: Ensure that the contract defines the scope of the project clearly. Make sure that it covers all the essential features and requirements.
  • Timeline: Ensure that the contract provides a realistic timeline for the project. Clarify any potential delays or bottlenecks.
  • Budget: Ensure that the contract provides a detailed breakdown of the project’s cost. Clarify any unexpected costs or hidden fees.
  • Deliverables: Ensure that the contract defines the deliverables and milestones for the project. Clarify any dependencies or prerequisites.
  • Payment Schedule: Ensure that the contract outlines the payment schedule for the project. Clarify any payment terms or conditions.

Establish Communication

After signing the contract, the next step is to establish communication with the front-end development agency or contractor. Effective communication is essential for the success of the project. When establishing communication, consider the following:

  • Communication Channels: Clarify the communication channels, such as email, phone, or project management tools.
  • Frequency: Clarify the frequency of communication, such as weekly or bi-weekly meetings.
  • Reporting: Clarify the reporting process, such as progress reports or status updates.
  • Documentation: Ensure that all communication is documented and stored in a centralized location for future reference.

Source the Perfect Front-End Development Agency or Contractor for Your Project

Sourcing a front-end development agency or contractor can be challenging, but by following these steps, you can find the right fit for your project. By determining your requirements, researching potential agencies or contractors, evaluating portfolios, checking references and reviews, conducting interviews, evaluating proposals, negotiating contracts, and establishing communication, you can ensure a successful project that meets your goals and objectives.

Categories
CSS HTML JavaScript Leadership Planning

Building an Effective Training Program for HTML, CSS, and JavaScript: A Comprehensive Guide for Teams

HTML, CSS, and JavaScript are the fundamental building blocks of modern web development. These technologies are essential for creating interactive, responsive, and visually appealing websites and applications. As a front-end developer or team lead, it’s important to ensure that your team has a solid understanding of these languages and the skills to apply them effectively.

In this article, we will provide a comprehensive guide to building a training program for HTML, CSS, and JavaScript that will help your team to learn and practice these skills. We will cover everything from setting goals and defining learning objectives, to selecting the right training materials and tools, to monitoring and evaluating the success of the program.

Setting Goals and Defining Learning Objectives

The first step in building an effective training program is to set clear goals and define learning objectives. This involves understanding what your team needs to learn, why they need to learn it, and how the training program will help them achieve their goals.

To set these goals and objectives, you may want to consider the following questions:

  • What are the most important skills and knowledge areas that your team needs to master in HTML, CSS, and JavaScript?
  • How will these skills and knowledge areas help your team to be more productive, efficient, and effective in their work?
  • What are the specific learning outcomes that you want your team to achieve by the end of the training program?

Once you have answered these questions, you can begin to define specific learning objectives that will guide the development of your training program. These objectives should be clear, measurable, and achievable, and should align with your team’s goals and needs.

Some examples of learning objectives for an HTML, CSS, and JavaScript training program might include:

  • Develop a working knowledge of HTML, CSS, and JavaScript syntax and semantics
  • Understand the principles of responsive web design and apply them to create effective layouts and designs
  • Use JavaScript to create interactive and dynamic user experiences, such as forms, sliders, and animations
  • Troubleshoot and debug common HTML, CSS, and JavaScript issues

Selecting Training Materials and Tools

Once you have defined your learning objectives, the next step is to select the right training materials and tools for your team. There are many options available, including online courses, books, tutorials, and interactive exercises.

When selecting training materials and tools, you should consider the following factors:

  • Quality: Are the materials and tools up-to-date, accurate, and reliable?
  • Relevance: Do the materials and tools cover the skills and knowledge areas that your team needs to learn?
  • Engagement: Are the materials and tools engaging and interactive, and do they provide opportunities for hands-on practice?
  • Accessibility: Are the materials and tools accessible to all members of your team, regardless of their experience level or learning style?

Some examples of training materials and tools for an HTML, CSS, and JavaScript training program might include:

  • Online courses and tutorials, such as Codecademy, Udemy, or Treehouse
  • Books and reference guides, such as “HTML and CSS: Design and Build Websites” by Jon Duckett or “JavaScript: The Good Parts” by Douglas Crockford
  • Interactive exercises and challenges, such as Codewars or HackerRank
  • Online communities and forums, such as Stack Overflow or Reddit, where team members can ask questions and get support from other developers

Designing a Training Schedule and Curriculum

Once you have selected your training materials and tools, the next step is to design a training schedule and curriculum that will help your team to achieve their learning objectives. This involves breaking down the training program into manageable modules or lessons, and determining the order in which they should be completed.

When designing your training schedule and curriculum, you should consider the following factors:

  • Sequence: What is the logical order in which the modules or lessons should be completed to build a strong foundation in HTML, CSS, and JavaScript?
  • Duration: How much time should be allocated to each module or lesson, and how long should the entire training program last?
  • Flexibility: How can the training schedule and curriculum be adapted to accommodate the different learning styles and paces of your team members?
  • Assessment: How will you assess your team’s progress and understanding throughout the training program, and what measures will you use to evaluate its effectiveness?

Some examples of modules or lessons that could be included in an HTML, CSS, and JavaScript training curriculum might include:

  • HTML basics, including tags, attributes, and document structure
  • CSS basics, including selectors, properties, and the box model
  • Responsive design, including media queries and flexible layouts
  • JavaScript fundamentals, including variables, data types, and control structures
  • DOM manipulation, including selecting elements, changing styles and attributes, and handling events
  • JavaScript frameworks and libraries, such as React, Vue, or jQuery
  • Debugging and troubleshooting common issues in HTML, CSS, and JavaScript

Implementing the Training Program

Once you have designed your training schedule and curriculum, the next step is to implement the program and provide support and guidance to your team as they learn and practice HTML, CSS, and JavaScript.

Some tips for implementing a successful training program include:

  • Communicate regularly with your team to keep them informed of upcoming training modules or lessons, and to provide feedback and support as they progress through the program.
  • Encourage collaboration and knowledge-sharing among team members, such as organizing group study sessions or pairing up more experienced developers with those who are new to HTML, CSS, and JavaScript.
  • Provide opportunities for hands-on practice and experimentation, such as creating small projects or assignments that allow team members to apply their newly acquired skills.
  • Offer incentives or rewards for completing the training program or achieving specific learning objectives, such as certificates of completion, bonuses, or promotions.
  • Continuously evaluate the effectiveness of the training program and make adjustments as needed based on feedback from team members or changes in technology or industry trends.

Building an Effective Training Program for HTML, CSS, and JavaScript

Building an effective training program for HTML, CSS, and JavaScript is an essential part of developing a skilled and productive front-end development team. By setting clear goals and learning objectives, selecting quality training materials and tools, designing a comprehensive training schedule and curriculum, and providing support and guidance to your team, you can help your team to develop the skills and knowledge they need to create high-quality, responsive, and engaging web applications.