Categories
AI Project Management

AI and the Art of Project Management: A Blueprint for Unprecedented Productivity

Imagine a scene from the near future: A project manager, her eyes scanning over a Gantt chart that could pass for a modern masterpiece, sits at her desk. Beside her, an AI assistant is not just a passive tool but an active participant, offering not just reminders or updates but deep, strategic insights gleaned from the analysis of thousands of similar projects. This scenario isn’t plucked from a sci-fi novel; it’s a vivid illustration of the revolutionary role AI is playing in Project Management.

In this article, we’re diving into the heart of how artificial intelligence is not just altering but expanding the horizons of project management. We’ll see how AI is moving beyond the mundane, automating the routine, and stepping into a realm previously unimagined – providing predictive analytics that don’t just streamline processes but transform them. It’s a journey into a world where AI’s capabilities in project management are not just an add-on but a game-changer, saving time, conserving resources, and opening new avenues for efficiency and creativity.

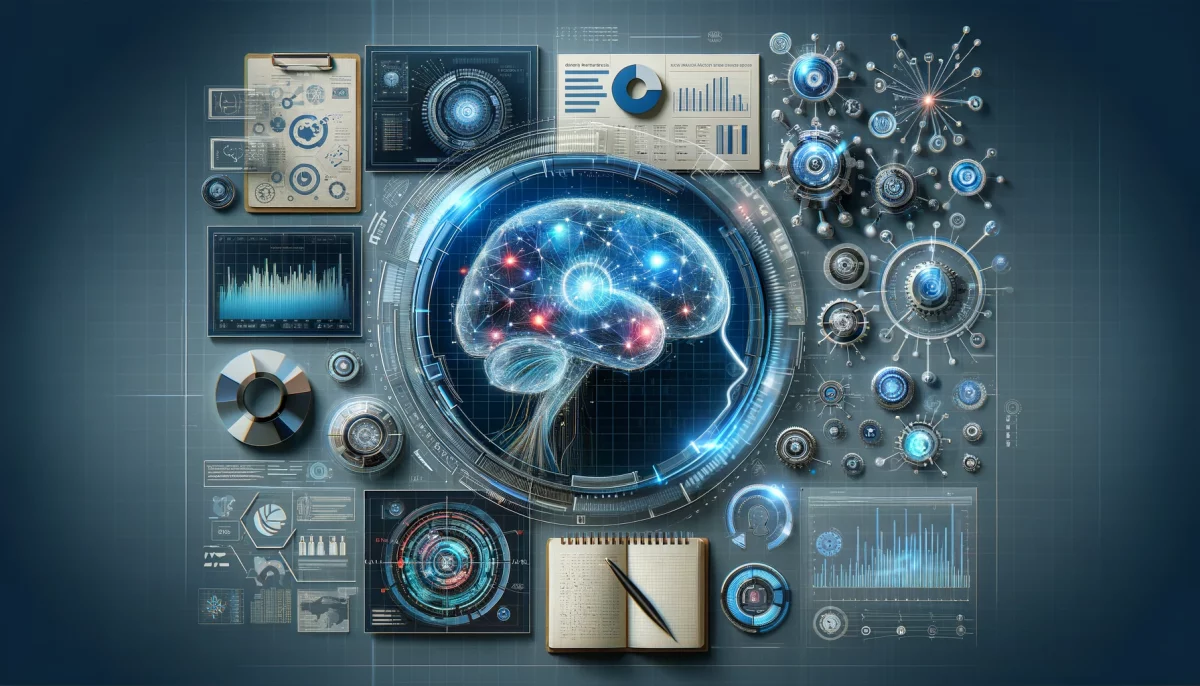
The AI Transformation: More Than Just Automation

Artificial Intelligence is often synonymous with automation, but in project management, its capabilities extend far beyond that. AI can sift through vast amounts of data to provide actionable insights, predict potential roadblocks, and even recommend adjustments to project timelines.

Data-Driven Decision Making

In traditional project management, decisions are often made based on experience, intuition, or both. While these methods have their merits, they are not foolproof. AI algorithms can analyze historical data, current trends, and social signals to make more informed decisions. For example, AI can predict the success rate of a project based on similar past projects, allowing project managers to allocate resources more efficiently.

Predictive Analytics for Proactive Management

Being reactive in project management can lead to delays and cost overruns. AI’s predictive analytics capabilities enable project managers to be proactive. By analyzing patterns and trends, AI can forecast potential issues before they become critical problems. This foresight allows for timely interventions, reducing the risk of project failure.

Empowering Team Collaboration with AI

In any project, effective team collaboration is crucial for success. AI takes this further by enhancing communication, task allocation, and overall team dynamics.

AI-Enhanced Communication

Communication is the backbone of any project. AI chatbots and virtual assistants can facilitate seamless communication among team members. These AI tools can schedule meetings, send reminders, and even translate messages in real time, making it easier for globally dispersed teams to collaborate.

Intelligent Task Allocation

AI algorithms can analyze team members’ skills, past performance, and workload to intelligently allocate tasks. This ensures that the right person is working on the right task at the right time, optimizing productivity and reducing the risk of delays.

Navigating Risks with AI’s Foresight

Risk is an inherent part of any project. However, AI’s predictive capabilities can significantly mitigate these risks.

Risk Identification and Assessment

AI can scan through project data to identify potential risks that might not be apparent to the human eye. Once identified, AI tools can assess the severity of these risks and suggest mitigation strategies.

Real-Time Risk Monitoring

Traditional risk monitoring often involves periodic reviews, which may not be sufficient in a fast-paced project environment. AI can provide real-time risk monitoring, alerting project managers when a risk factor crosses a predetermined threshold.

Optimizing Resource Allocation with AI

Resource allocation is a balancing act that can make or break a project. AI offers sophisticated solutions that go beyond simple resource levelling.

Dynamic Resource Allocation

Traditional resource allocation often relies on static plans that don’t adapt well to changes. AI, on the other hand, can dynamically allocate resources based on real-time project status, team availability, and other variables. This dynamic approach ensures optimal utilization of resources throughout the project lifecycle.

Cost-Efficiency Through AI

AI can also play a significant role in cost management. By analyzing historical data and current project metrics, AI can provide insights into cost-saving opportunities without compromising the project’s quality.

Ethical Considerations: The Double-Edged Sword of AI

While AI offers numerous advantages, it also raises ethical questions that project managers must consider.

Data Privacy and Security

AI systems require access to vast amounts of data, raising concerns about data privacy and security. Project managers must ensure that AI tools comply with data protection regulations and that sensitive information is safeguarded.

Human-AI Collaboration

As AI takes on more roles in project management, there’s a concern about human displacement. It’s essential to view AI as a tool that augments human capabilities rather than replaces them. Ethical guidelines must be in place to ensure that the human workforce is upskilled rather than sidelined.

AI and the Art of Project Management

As we navigate the complexities of modern project management, it’s clear that AI is not just a technological advancement but a paradigm shift. From automating mundane tasks to providing strategic insights, AI redefines the boundaries of what’s possible. It offers a new lens through which we can view project management: more dynamic, data-driven, and proactive.

However, the adoption of AI is not without its challenges. Ethical considerations, such as data privacy and human-AI collaboration, require thoughtful deliberation. But these challenges are not insurmountable. With the right guidelines and a balanced approach, AI can serve as a powerful ally in achieving unprecedented levels of productivity and efficiency.

In the grand tapestry of project management, AI is not merely a thread but a vibrant colour that adds depth, texture, and complexity. As we continue to weave this tapestry, let us embrace AI as a transformative force, one that has the potential to turn even the most intricate projects into masterpieces of success.

Categories
CSS HTML JavaScript Leadership Planning Project Management

Maximizing Collaboration in a Front-End Developer Trio: The Ultimate Guide to Effective Teamwork

As front-end developers, collaboration is essential to successfully completing projects, and it becomes even more crucial when working in a team of three. This comprehensive guide will explore strategies for enhancing teamwork among front-end developer trios, ensuring projects are completed efficiently and to a high standard. We’ll dive into the importance of clear communication, setting goals, task delegation, code review, and more. So buckle up and get ready to transform your front-end developer trio into a powerhouse of productivity and collaboration.

Establish Clear Communication Channels

In-Person Meetings

In-person meetings provide the most direct form of communication, allowing team members to discuss progress, challenges, and ideas face-to-face. Schedule regular team meetings at the beginning and end of each week to set priorities, discuss progress, and identify any roadblocks. Additionally, hold ad-hoc meetings when the need arises to ensure that everyone stays in the loop and has a chance to voice their concerns or provide input.

Video Conferencing Tools

If your team is distributed or remote, video conferencing tools like Zoom or Google Meet can help facilitate virtual face-to-face communication. Schedule regular video calls to discuss project updates, brainstorm ideas, and maintain a strong sense of team cohesion. When using video conferencing, ensure that everyone has a reliable internet connection and the necessary hardware to participate effectively.

Project Management Platforms

Project management platforms like Trello, Asana, or Jira provide a centralized location for tracking tasks, deadlines, and progress. By using these tools, your team can easily collaborate on tasks, share files, and leave comments to streamline communication. Ensure that everyone on the team understands how to use the chosen platform and stays engaged by regularly updating their tasks and participating in discussions.

Define Roles and Responsibilities

UI/UX Designer

The UI/UX designer is responsible for creating the visual design of the website or application, ensuring that it is both aesthetically pleasing and user-friendly. This team member should have a strong understanding of design principles, color theory, and user experience best practices. They will work closely with the other front-end developers to bring their designs to life through HTML, CSS, and JavaScript.

HTML/CSS Developer

The HTML/CSS developer is responsible for converting the UI/UX designer’s vision into a functional website or application. They should have a deep understanding of HTML and CSS, as well as experience with responsive design techniques and cross-browser compatibility. This team member will collaborate closely with the UI/UX designer to ensure that the design is accurately implemented and maintains a consistent look and feel across various devices and browsers.

JavaScript Developer

The JavaScript developer is responsible for adding interactivity and functionality to the website or application. They should have a solid understanding of JavaScript, as well as experience with popular libraries and frameworks like React, Angular, or Vue.js. This team member will work with the HTML/CSS developer and UI/UX designer to integrate their code seamlessly into the project and ensure that the website or application functions smoothly and efficiently.

Set SMART Goals

Project Scope

Before setting goals, it’s essential to understand the project scope. This involves outlining the key features and functionality that the website or application must include, as well as any specific design or technical requirements. By having a clear understanding of the project scope, your team can set realistic and achievable goals that will guide the development process.

Client Requirements

Understanding the client’s needs and expectations is crucial for setting goals that will ultimately lead to a successful project. Communicate with the client regularly to gather feedback and ensure that their requirements are being met. By setting goals that align with the client’s vision, your team is more likely to deliver a finished product that meets or exceeds their expectations.

Timeline

Establishing a realistic timeline is essential for setting SMART goals. Consider the project scope, client requirements, and any potential obstacles that may arise during development. Set milestones for each phase of the project and establish deadlines for completing specific tasks. By setting time-bound goals, your team can maintain a steady pace and ensure that the project stays on track.

Divide and Conquer: Effective Task Delegation

Prioritize tasks based on urgency and importance

When delegating tasks, consider their urgency and importance in the context of the project. Tasks that are both urgent and important should be prioritized and tackled first, while tasks that are less critical can be delegated to a later stage in the project. By prioritizing tasks effectively, your team can ensure that essential tasks are completed in a timely manner and avoid potential bottlenecks.

Create a task list and assign tasks to each team member

Once tasks have been prioritized, create a comprehensive task list that outlines each task, its deadline, and the team member responsible for completing it. Assign tasks based on each team member’s expertise and availability, ensuring that the workload is distributed evenly. This task list should be regularly reviewed and updated to reflect the progress of the project and any changes in priorities or deadlines.

Utilize project management tools to track progress

Using project management tools like Trello, Asana, or Jira can help your team stay organized and on top of their tasks. These tools allow team members to track their progress, leave comments or updates, and collaborate more effectively. Ensure that everyone on the team is familiar with the chosen project management tool and actively engages with it to maximize its benefits.

Implement Version Control and Workflow Management

Git and GitHub

Utilizing version control tools like Git and GitHub is essential for maintaining a well-organized codebase and collaborating on code changes. Git allows your team to create branches, commit changes, and merge code updates without overwriting each other’s work. GitHub provides a platform for hosting and sharing your code, as well as tracking issues, managing pull requests, and collaborating on code reviews.

Git Flow

Implementing a branching strategy like Git Flow can help streamline your development process and reduce conflicts between team members’ work. Git Flow defines a set of rules and best practices for creating and managing branches, ensuring that your codebase remains organized and that changes are integrated smoothly. By adopting a structured workflow like Git Flow, your team can work more efficiently and minimize potential conflicts.

Continuous Integration and Deployment

Utilizing continuous integration (CI) and continuous deployment (CD) tools can help automate the process of building, testing, and deploying your code. Tools like Jenkins, Travis CI, or CircleCI can automatically build and test your code whenever changes are pushed to the repository, providing immediate feedback on the success of your changes. By incorporating CI/CD into your development workflow, your team can catch and fix issues more quickly and maintain a higher level of code quality.

Emphasize Code Consistency and Maintainability

Shared Coding Style Guide

Adopting a shared coding style guide is crucial for ensuring that your code is consistent and easy to read. A style guide outlines the rules and conventions for writing code, such as indentation, naming conventions, and code organization. By adhering to a shared style guide, your team can minimize confusion and make it easier for team members to understand and work with each other’s code.

ESLint or Prettier

Tools like ESLint or Prettier can help enforce code formatting rules automatically, making it easier for your team to maintain a consistent coding style. ESLint is a configurable linting tool that analyzes your JavaScript code for potential issues and enforces coding rules, while Prettier is an opinionated code formatter that ensures your code is consistently formatted. By incorporating these tools into your development process, your team can save time and maintain a higher level of code quality.

Code Documentation and Comments

Ensuring that your code is well-documented and commented can greatly improve its maintainability. Clear and concise comments help explain the purpose of specific functions, variables, or code blocks, making it easier for team members to understand and modify the code in the future. Encourage your team to adopt a consistent approach to documentation and commenting, and consider using tools like JSDoc to generate API documentation automatically from your code comments.

Conduct Regular Code Reviews

Improved code quality

Regular code reviews can help identify potential issues and improve the overall quality of your code. By having team members review each other’s work, you can catch bugs, identify performance bottlenecks, and ensure that best practices are being followed. This collaborative approach to code quality helps create a sense of shared ownership and responsibility within the team.

Faster identification of bugs and issues

The earlier bugs and issues are identified, the easier and less costly they are to fix. Conducting regular code reviews allows your team to spot potential problems before they become more significant issues. This proactive approach to bug identification can save time and resources, as well as reduce the risk of introducing new bugs when fixing existing ones.

Enhanced knowledge sharing

Code reviews provide an excellent opportunity for team members to learn from each other and share knowledge. By reviewing each other’s code, developers can gain insights into different approaches and techniques, as well as learn about any new tools or technologies being used. This collaborative learning environment can help your team grow and improve their skills, ultimately leading to better project outcomes.

Strengthened teamwork and communication

Code reviews are a vital aspect of fostering a strong sense of teamwork and open communication within your front-end developer trio. By engaging in regular code reviews, team members can provide constructive feedback, ask questions, and discuss potential improvements. This open dialogue helps create an atmosphere of trust and support, which is essential for effective collaboration.

Maximizing Collaboration in a Front-End Developer Trio

In conclusion, working effectively as a team of three front-end developers requires clear communication, defined roles and responsibilities, SMART goals, efficient task delegation, proper version control and workflow management, code consistency, and regular code reviews. By implementing these strategies and fostering a collaborative environment, your front-end developer trio can maximize productivity and deliver high-quality projects on time and within budget.

Categories
CSS HTML JavaScript Planning Project Management

8 Steps to Source the Perfect Front-End Development Agency or Contractor for Your Project

When it comes to developing a website or application, front-end development is a crucial component. A front-end developer is responsible for creating the interface that users interact with, including the layout, navigation, and user experience. However, finding the right front-end development agency or contractor can be challenging. There are numerous factors to consider, including experience, portfolio, communication, and budget. In this article, we’ll discuss how to source a front-end development agency or contractor for a project.

Determine Your Requirements

The first step in sourcing a front-end development agency or contractor is to determine your requirements. You need to have a clear understanding of what you want to achieve with your project. Some of the questions you should ask yourself include:

  • What is the purpose of the project?
  • Who is the target audience?
  • What are the essential features of the project?
  • What is the budget and timeline for the project?
  • What is the overall style and design of the project?

Answering these questions will help you identify the skills and experience you need from a front-end development agency or contractor.

Research Potential Agencies or Contractors

Once you have a clear understanding of your project requirements, the next step is to research potential front-end development agencies or contractors. You can start by asking for recommendations from friends, colleagues, or industry contacts. Additionally, you can search online for agencies or contractors with experience in your industry or niche.

When researching potential agencies or contractors, some of the factors to consider include:

  • Experience: How long has the agency or contractor been in business? What kind of projects have they worked on in the past? Do they have experience in your industry or niche?
  • Portfolio: What kind of work has the agency or contractor done in the past? Do they have examples of work that are similar to your project? Are there any case studies or testimonials from previous clients?
  • Communication: How responsive are the agency or contractor? Do they communicate clearly and effectively? Do they understand your project requirements and goals?
  • Technical Skills: What technical skills does the agency or contractor possess? Do they have expertise in the programming languages and frameworks required for your project?

Evaluate the Portfolio

Once you’ve identified potential front-end development agencies or contractors, the next step is to evaluate their portfolios. A portfolio provides insight into the type of work a development agency or contractor has done in the past. It will give you an idea of their style, design, and technical skills. When evaluating a portfolio, consider the following:

  • Quality: Is the quality of the work high? Do the websites or applications look professional and well-designed?
  • Diversity: Does the portfolio demonstrate a diverse range of skills and experience? Does the agency or contractor have experience working with different industries or niches?
  • Relevance: Are there any examples in the portfolio that are similar to your project? Can you see evidence of the agency or contractor’s ability to deliver on your project requirements?
  • Client List: Who are the agency or contractor’s previous clients? Are there any well-known brands or companies on the list?

Check References and Reviews

Before hiring a front-end development agency or contractor, it’s essential to check references and reviews. References provide insight into the agency or contractor’s work ethic, communication skills, and ability to meet deadlines. Reviews provide an overview of the agency or contractor’s overall reputation and customer satisfaction. When checking references and reviews, consider the following:

  • Responsiveness: Did the agency or contractor respond quickly to emails and calls? Did they keep you updated on the progress of the project?
  • Quality: Did the agency or contractor deliver high-quality work that met your project requirements?
  • Communication: Did the agency or contractor communicate effectively and clearly? Were they able to understand your project requirements and goals?
  • Timeliness: Did the agency or contractor deliver the project on time and within budget? Were there any delays or unexpected costs?
  • Professionalism: Did the agency or contractor behave professionally throughout the project? Were they easy to work with?

Conduct Interviews

After evaluating the portfolio and checking references and reviews, the next step is to conduct interviews with potential front-end development agencies or contractors. An interview provides an opportunity to ask questions, clarify project requirements, and assess the agency or contractor’s communication skills.

During the interview, consider asking the following questions:

  • Can you tell me about your experience working on projects similar to mine?
  • What programming languages and frameworks do you have experience with?
  • How do you approach problem-solving and troubleshooting during a project?
  • What is your communication process during a project?
  • How do you ensure that the project is delivered on time and within budget?
  • Can you provide me with a rough estimate of the project’s timeline and cost?
  • Can you tell me about a challenging project you’ve worked on in the past and how you overcame the challenges?

Evaluate the Proposal

After conducting interviews, the next step is to evaluate the proposal. The proposal should provide a detailed overview of the project, including the scope, timeline, budget, and deliverables. When evaluating the proposal, consider the following:

  • Scope: Does the proposal clearly define the scope of the project? Does it cover all the essential features and requirements?
  • Timeline: Does the proposal provide a realistic timeline for the project? Are there any potential delays or bottlenecks?
  • Budget: Does the proposal provide a detailed breakdown of the project’s cost? Are there any unexpected costs or hidden fees?
  • Deliverables: Does the proposal define the deliverables and milestones for the project? Are there any dependencies or prerequisites?

Negotiate the Contract

After evaluating the proposal, the next step is to negotiate the contract. The contract should outline the terms and conditions of the project, including the scope, timeline, budget, deliverables, and payment schedule. When negotiating the contract, consider the following:

  • Scope: Ensure that the contract defines the scope of the project clearly. Make sure that it covers all the essential features and requirements.
  • Timeline: Ensure that the contract provides a realistic timeline for the project. Clarify any potential delays or bottlenecks.
  • Budget: Ensure that the contract provides a detailed breakdown of the project’s cost. Clarify any unexpected costs or hidden fees.
  • Deliverables: Ensure that the contract defines the deliverables and milestones for the project. Clarify any dependencies or prerequisites.
  • Payment Schedule: Ensure that the contract outlines the payment schedule for the project. Clarify any payment terms or conditions.

Establish Communication

After signing the contract, the next step is to establish communication with the front-end development agency or contractor. Effective communication is essential for the success of the project. When establishing communication, consider the following:

  • Communication Channels: Clarify the communication channels, such as email, phone, or project management tools.
  • Frequency: Clarify the frequency of communication, such as weekly or bi-weekly meetings.
  • Reporting: Clarify the reporting process, such as progress reports or status updates.
  • Documentation: Ensure that all communication is documented and stored in a centralized location for future reference.

Source the Perfect Front-End Development Agency or Contractor for Your Project

Sourcing a front-end development agency or contractor can be challenging, but by following these steps, you can find the right fit for your project. By determining your requirements, researching potential agencies or contractors, evaluating portfolios, checking references and reviews, conducting interviews, evaluating proposals, negotiating contracts, and establishing communication, you can ensure a successful project that meets your goals and objectives.

Categories
Planning Project Management

Navigating Complex Approval Processes as a Front-End Developer: Tips and Tools

As a front-end developer, navigating complex approval processes can be challenging. From dealing with stakeholder feedback to adhering to strict guidelines and regulations, there are a lot of factors to consider. However, with the right approach and tools, you can successfully navigate these approval processes and deliver high-quality work that meets the needs of all parties involved. In this article, we’ll explore some of the best practices and strategies for navigating complex approval processes as a front-end developer.

Understanding the Approval Process

Before we dive into the strategies for navigating complex approval processes, it’s important to have a clear understanding of what the approval process entails. Approval processes can vary depending on the industry and project, but they generally follow a similar structure:

  1. Request: Someone requests a change or new project, such as a new website or feature.
  2. Proposal: A proposal is created and submitted to stakeholders for approval.
  3. Feedback: Stakeholders review the proposal and provide feedback, which may involve revisions to the proposal.
  4. Approval: Once all stakeholders have signed off on the proposal, the project moves forward.

It’s important to note that the approval process is not a linear process. Stakeholders may provide feedback at any point in the process, and revisions may be required before final approval is given. Additionally, the approval process may involve multiple rounds of feedback and revisions before final approval is granted.

Communicating with Stakeholders

One of the most important aspects of navigating complex approval processes is effective communication with stakeholders. Stakeholders may include clients, managers, other departments, or even regulatory agencies. It’s essential to keep stakeholders informed throughout the process and to provide updates on progress.

To ensure effective communication, consider the following strategies:

  1. Define Roles and Responsibilities: Clarify the roles and responsibilities of each stakeholder involved in the approval process. This can help prevent misunderstandings and ensure that everyone knows what is expected of them.
  2. Establish Communication Channels: Establish clear communication channels for feedback and updates. This can include regular meetings, email updates, or even a project management tool.
  3. Be Transparent: Be transparent about the process and the progress being made. This can help build trust and prevent surprises later in the process.
  4. Address Concerns: Address concerns and questions from stakeholders as soon as possible. This can help prevent issues from escalating and ensure that all parties are on the same page.

Managing Feedback

As a front-end developer, you’ll likely receive feedback from multiple stakeholders throughout the approval process. This feedback may include suggestions for changes, requests for additional features, or even regulatory requirements. Managing this feedback can be challenging, but there are strategies you can use to streamline the process and ensure that all feedback is addressed.

  1. Prioritize Feedback: Prioritize feedback based on its importance and impact on the project. This can help ensure that the most critical feedback is addressed first.
  2. Organize Feedback: Organize feedback in a clear and easy-to-understand format. This can include creating a spreadsheet or using a project management tool to track feedback.
  3. Respond to Feedback: Respond to feedback in a timely manner, and be clear about whether you can accommodate the request or not. If you cannot accommodate the request, be sure to explain why and provide alternative solutions.
  4. Seek Clarification: If feedback is unclear or confusing, seek clarification from the stakeholder. This can help prevent misunderstandings and ensure that the feedback is addressed appropriately.

Adhering to Guidelines and Regulations

Another important aspect of navigating complex approval processes is adhering to guidelines and regulations. Depending on the project, you may need to comply with industry standards, legal requirements, or even accessibility guidelines. It’s essential to understand these guidelines and regulations and to ensure that your work meets the necessary standards.

  1. Research Guidelines and Regulations: Research the guidelines and regulations
  2. Implement Guidelines and Regulations: Once you have a clear understanding of the guidelines and regulations, implement them in your work. This may involve making changes to the design, code, or content to ensure that it meets the necessary standards.
  3. Test for Compliance: Test your work to ensure that it meets the necessary guidelines and regulations. This may involve using tools to test for accessibility or compliance with legal requirements. Make sure that you address any issues that are identified during testing.
  4. Document Compliance: Document your compliance with guidelines and regulations. This can help demonstrate that your work meets the necessary standards and can help prevent issues down the line.

Managing Scope Creep

Scope creep is a common challenge in complex approval processes. This occurs when the scope of the project expands beyond its original goals and requirements. This can lead to delays, increased costs, and dissatisfaction among stakeholders. As a front-end developer, it’s important to manage scope creep and ensure that the project stays on track.

  1. Define Scope: Clearly define the scope of the project at the outset. This can help prevent misunderstandings and ensure that everyone is on the same page.
  2. Review Changes: Review proposed changes to the project and evaluate their impact on the scope of the project. This can help prevent scope creep and ensure that changes are in line with the original goals and requirements.
  3. Communicate Changes: Communicate changes to the project scope to all stakeholders. This can help prevent misunderstandings and ensure that everyone is aware of any changes.
  4. Document Changes: Document changes to the project scope. This can help prevent scope creep and ensure that everyone is aware of any changes.

Using Project Management Tools

Project management tools can be a valuable asset when navigating complex approval processes. These tools can help you stay organized, track progress, and communicate with stakeholders. There are many project management tools available, so it’s important to choose one that works for your needs.

  1. Choose a Tool: Choose a project management tool that works for your needs. This may involve evaluating different tools based on their features, cost, and ease of use.
  2. Use Templates: Use templates to create consistent project documentation, such as proposals and status reports. This can help save time and ensure that all necessary information is included.
  3. Assign Tasks: Assign tasks to team members and stakeholders using the project management tool. This can help ensure that everyone is clear on their responsibilities and that progress is tracked.
  4. Track Progress: Use the project management tool to track progress and provide regular updates to stakeholders. This can help ensure that everyone is aware of the status of the project and can help prevent surprises later in the process.

Navigating Complex Approval Processes as a Front-End Developer

Navigating complex approval processes as a front-end developer can be challenging, but with the right approach and tools, it’s possible to deliver high-quality work that meets the needs of all parties involved. By understanding the approval process, communicating effectively with stakeholders, managing feedback, adhering to guidelines and regulations, managing scope creep, and using project management tools, you can successfully navigate complex approval processes and deliver successful projects. Remember that effective communication and organization are key to navigating these processes, and don’t be afraid to seek guidance or clarification when necessary. With practice, you’ll become more adept at navigating these processes and delivering successful projects.

Categories
Planning Project Management

Building a Successful Website: A Guide to Collaborating with Clients for Effective Website Development

Developing a website for a client is a complex process that requires a collaborative effort between the client and the development team. In this article, we will explore the process of working with clients to develop a website, from the initial planning stages to the final product. We will also discuss best practices for communicating with clients, managing expectations, and ensuring a successful outcome.

Phase 1: Pre-Planning

Before the website development process can begin, there are several important steps that need to be taken to ensure a successful outcome. These steps include understanding the client’s needs, defining project goals, and setting expectations.

Understanding the Client’s Needs

The first step in the pre-planning phase is to understand the client’s needs. This involves asking questions about the client’s business, target audience, and goals for the website. It is important to understand what the client wants to achieve with their website so that the development team can create a website that meets those goals.

Defining Project Goals

Once the client’s needs are understood, it is important to define the project goals. This involves setting clear, measurable objectives for the website. For example, the goal of the website might be to increase online sales, improve brand awareness, or generate leads. By defining project goals, the development team can create a website that is designed to achieve those objectives.

Setting Expectations

Finally, it is important to set expectations for the website development process. This includes establishing timelines, determining budget, and identifying the roles and responsibilities of everyone involved in the project. By setting expectations up front, the development team can ensure that the client’s needs are met and that the project stays on track.

Phase 2: Design and Development

Once the pre-planning phase is complete, the design and development process can begin. This phase involves creating a website that meets the client’s needs and achieves the project goals.

Design

The design phase involves creating a visual representation of the website. This includes creating wireframes, mockups, and prototypes. The design team will work closely with the client to ensure that the design meets their needs and reflects their brand. The design team will also ensure that the design is user-friendly and optimized for search engines.

Development

Once the design is finalized, the development phase can begin. This involves coding the website and creating the functionality that the client needs. The development team will work closely with the design team to ensure that the website looks and functions as expected. The development team will also ensure that the website is optimized for speed and performance.

Phase 3: Testing and Launch

Once the website is designed and developed, it is important to test it thoroughly to ensure that it is functioning as expected. This involves testing the website for usability, compatibility, and security.

Usability Testing

Usability testing involves testing the website to ensure that it is easy to use and navigate. This involves testing the website with real users to identify any issues or areas for improvement.

Compatibility Testing

Compatibility testing involves testing the website to ensure that it is compatible with different browsers, devices, and operating systems. This ensures that the website is accessible to a wide range of users.

Security Testing

Finally, security testing involves testing the website to ensure that it is secure and protected from potential threats. This includes testing the website for vulnerabilities and implementing security measures to protect the website and its users.

Once testing is complete, the website can be launched. This involves publishing the website to the client’s domain and making it live on the internet. The development team will work closely with the client to ensure that the launch is successful and that the website is functioning as expected.

Phase 4: Post-Launch

Once the website is launched, there are several important steps that need to be taken to ensure that it continues to function as expected. These steps include monitoring performance,

updating content, and providing ongoing support.

Performance Monitoring

Performance monitoring involves tracking the website’s performance metrics, such as traffic, bounce rate, and conversion rates. This helps identify areas for improvement and ensures that the website is meeting the client’s goals.

Content Updates

Keeping the website up-to-date is essential for maintaining its relevance and effectiveness. This involves regularly updating content, such as blog posts, product descriptions, and images. The development team can work with the client to develop a content strategy and schedule for updating the website.

Ongoing Support

Providing ongoing support is essential for ensuring that the website continues to function as expected. This includes providing technical support, troubleshooting issues, and addressing any concerns that the client may have. The development team can also provide training and resources to help the client manage and update their website.

Best Practices for Working with Clients

Working with clients to develop a website requires effective communication, collaboration, and project management. Here are some best practices for working with clients:

Establish clear communication channels: It is important to establish clear channels of communication with the client, such as email, phone, and project management tools. This ensures that everyone is on the same page and that information is shared effectively.

Set clear expectations: Setting clear expectations for timelines, budget, and deliverables is essential for ensuring that the project stays on track and that the client’s needs are met.

Involve the client in the process: Involving the client in the design and development process helps ensure that their needs and preferences are incorporated into the website. It also helps build trust and rapport between the client and the development team.

Provide regular updates: Providing regular updates on the progress of the project helps keep the client informed and engaged in the process. This helps prevent misunderstandings and ensures that everyone is working towards the same goals.

Building a Successful Website

Developing a website for a client is a complex process that requires effective communication, collaboration, and project management. By following best practices and working closely with the client, the development team can create a website that meets the client’s needs and achieves their goals. It is important to approach website development as a collaborative effort and to prioritize the client’s needs and preferences throughout the process. By doing so, the development team can ensure a successful outcome and build a strong, long-lasting relationship with the client.

Categories
Planning Project Management Target Audience

10 Steps to Plan and Launch a Successful Website: A Comprehensive Guide for Beginners

Planning a website launch can be a daunting task, but with the right preparation, it can be a smooth and successful process. A website launch is not just about making your site live on the internet, it is also about creating a positive first impression and generating interest and engagement from your target audience. In this article, we will discuss the steps you need to take to plan a successful website launch.

  1. Define your goals

The first step in planning a website launch is to define your goals. What do you hope to achieve with your website? Are you looking to generate leads, sell products, or simply provide information? Defining your goals will help you determine what features your site needs, what content you need to create, and what metrics you will use to measure your success.

  1. Identify your target audience

Once you have defined your goals, you need to identify your target audience. Who are you trying to reach with your website? What are their interests and needs? Understanding your target audience will help you create content and design your site in a way that resonates with them.

  1. Conduct a competitive analysis

Before launching your website, it is important to conduct a competitive analysis. This will help you understand what your competitors are doing, what is working for them, and what is not. You can use this information to create a website that stands out from the competition and offers something unique to your target audience.

  1. Choose the right platform and tools

There are many website platforms and tools available, so it is important to choose the right ones for your needs. Consider factors such as ease of use, scalability, and customization options when making your decision. You will also need to choose the right tools for analytics, SEO, and social media integration.

  1. Develop a content strategy

Content is a crucial element of any website, so it is important to develop a content strategy before launching your site. This includes creating a plan for the types of content you will create, how often you will publish new content, and how you will promote your content to your target audience.

  1. Design your site

Once you have defined your goals, identified your target audience, conducted a competitive analysis, chosen the right platform and tools, and developed a content strategy, it is time to design your site. This includes creating a site map, wireframes, and a visual design. Your site design should reflect your brand, be user-friendly, and provide a positive user experience.

  1. Develop your site

With your site design in place, it is time to start developing your site. This includes creating and optimizing your site’s pages, adding functionality, and ensuring that your site is mobile-responsive.

  1. Test and debug

Before launching your site, it is important to test and debug it to ensure that everything is working properly. This includes testing your site’s functionality, navigation, and user experience across different devices and browsers. You should also test your site’s load time and make any necessary adjustments to improve performance.

  1. Plan your launch

Once your site has been tested and debugged, it is time to plan your launch. This includes deciding on a launch date and creating a launch plan. Your launch plan should include a list of tasks that need to be completed before launch, such as setting up analytics and SEO, creating social media accounts, and drafting press releases.

  1. Promote your site

After your site has launched, it is important to promote it to your target audience. This includes creating social media campaigns, running advertising campaigns, and reaching out to influencers and media outlets. You should also track your site’s metrics and make adjustments as needed to improve your site’s performance.

Now that we have discussed the steps involved in planning a website launch, let’s take a closer look at each of these steps in more detail.

Define Your Goals

Defining your goals is the first and most crucial step in planning a website launch. Your goals will determine the direction of your site, the features you need to include, the content you need to create, and the metrics you will use to measure your success.

When defining your goals, ask yourself the following questions:

  • What is the purpose of my website?
  • What do I hope to achieve with my website?
  • Who is my target audience?
  • What are the most important metrics for measuring success?

For example, if you are creating a website to generate leads for your business, your goals may include:

  • Increasing the number of leads generated through the site
  • Improving the conversion rate of visitors to leads
  • Increasing the amount of time visitors spend on the site

Once you have defined your goals, you can begin to create a plan for achieving them.

Identify Your Target Audience

The success of your website depends on your ability to attract and engage your target audience. To do this, you need to understand who your target audience is and what they are looking for.

When identifying your target audience, consider the following factors:

  • Age
  • Gender
  • Location
  • Interests
  • Needs
  • Pain points

Use this information to create user personas that represent your ideal customers. User personas can help you create content that resonates with your target audience, design your site in a way that meets their needs, and create marketing campaigns that reach them effectively.

Conduct a Competitive Analysis

Before launching your website, it is important to conduct a competitive analysis to understand what your competitors are doing and what is working for them. This will help you create a website that stands out from the competition and offers something unique to your target audience.

When conducting a competitive analysis, consider the following factors:

  • Design: How does your competitor’s site look and feel? Is it visually appealing and easy to navigate?
  • Content: What type of content does your competitor create? How often do they publish new content?
  • SEO: How does your competitor rank in search engine results? What keywords do they target?
  • Social media: How does your competitor use social media? What platforms do they use?
  • Conversion optimization: How does your competitor convert visitors into leads or customers?

Use this information to create a plan for creating a website that stands out from the competition and meets the needs of your target audience.

Choose the Right Platform and Tools

There are many website platforms and tools available, so it is important to choose the right ones for your needs. Consider factors such as ease of use, scalability, and customization options when making your decision. You will also need to choose the right tools for analytics, SEO, and social media integration.

When choosing a platform, consider the following factors:

  • Ease of use: Is the platform easy to use for beginners?
  • Scalability: Can the platform handle a large amount of traffic and content?
  • Customization options: Can you customize the design and functionality of your site?
  • Security: Does the platform offer adequate security features?

When choosing tools for analytics, SEO, and social media integration, consider the following factors:

  • Functionality: Does the tool offer the features you need?
  • Integration: Does the tool integrate with your website platform?
  • Cost: Is the tool cost-effective for your budget?

Choose the platform and tools that best meet your needs and budget.

Develop a Content Strategy

Content is a crucial element of any website, so it is important to develop a content strategy before launching your site. This includes creating a plan for the types of content you will create, how often you will publish new content, and how you will promote your content to your target audience.

When developing a content strategy, consider the following factors:

  • Types of content: What types of content will you create, such as blog posts, videos, infographics, or podcasts? What topics will you cover?
  • Frequency: How often will you publish new content? Will you have a content calendar?
  • Promotion: How will you promote your content to your target audience, such as through social media, email marketing, or paid advertising?

Create a content strategy that aligns with your goals, target audience, and budget.

Design Your Website

Once you have a clear understanding of your goals, target audience, and content strategy, it is time to design your website. Your website design should reflect your brand and appeal to your target audience.

When designing your website, consider the following factors:

  • Visual appeal: Is your website visually appealing and easy to navigate?
  • Branding: Does your website reflect your brand, such as your logo, color scheme, and tone of voice?
  • User experience: Is your website easy to use and navigate? Is the content easy to read and understand?
  • Mobile responsiveness: Is your website optimized for mobile devices?

Create a website design that is visually appealing, user-friendly, and reflects your brand.

Test Your Website

Before launching your website, it is important to test it to ensure that it is functioning properly and meets the needs of your target audience. This includes testing for functionality, usability, and performance.

When testing your website, consider the following factors:

  • Functionality: Are all the links, forms, and other features working correctly?
  • Usability: Is your website easy to navigate and use? Is the content easy to understand?
  • Performance: Is your website loading quickly? Is it optimized for different devices and internet speeds?

Test your website thoroughly to ensure that it is functioning properly and meeting the needs of your target audience.

Launch Your Website

Once you have completed all the steps above, it is time to launch your website. This includes making your website live, promoting it to your target audience, and monitoring its performance.

When launching your website, consider the following factors:

  • Making your website live: Make sure that your website is live and accessible to your target audience.
  • Promoting your website: Use your content strategy to promote your website to your target audience through social media, email marketing, and other channels.
  • Monitoring performance: Use analytics tools to monitor the performance of your website, such as traffic, engagement, and conversion rates. Use this information to make improvements and optimize your website over time.

Launch your website and begin promoting it to your target audience. Monitor its performance and make improvements over time to ensure that it is meeting your goals.

10 Steps to Plan and Launch a Successful Website

Launching a website requires careful planning and execution. By following the steps above, you can create a website that meets the needs of your target audience, reflects your brand, and achieves your goals. Remember to define your goals, identify your target audience, conduct a competitive analysis, choose the right platform and tools, develop a content strategy, design your website, test it thoroughly, and launch it to your target audience. By taking these steps, you can create a website that is successful and drives results for your business or organization.